
Now that we can no longer walk down the hall or gather by the coffee pot to chat with co-workers, Microsoft Teams is the new normal for office communications. As with most other communication platforms, Microsoft Teams allows one to send instant messages (IMs) and make phone calls, but there are a multitude of other things the program can do. Below are 10 tips to help you save time with Microsoft Teams:
1. Use the Command Bar
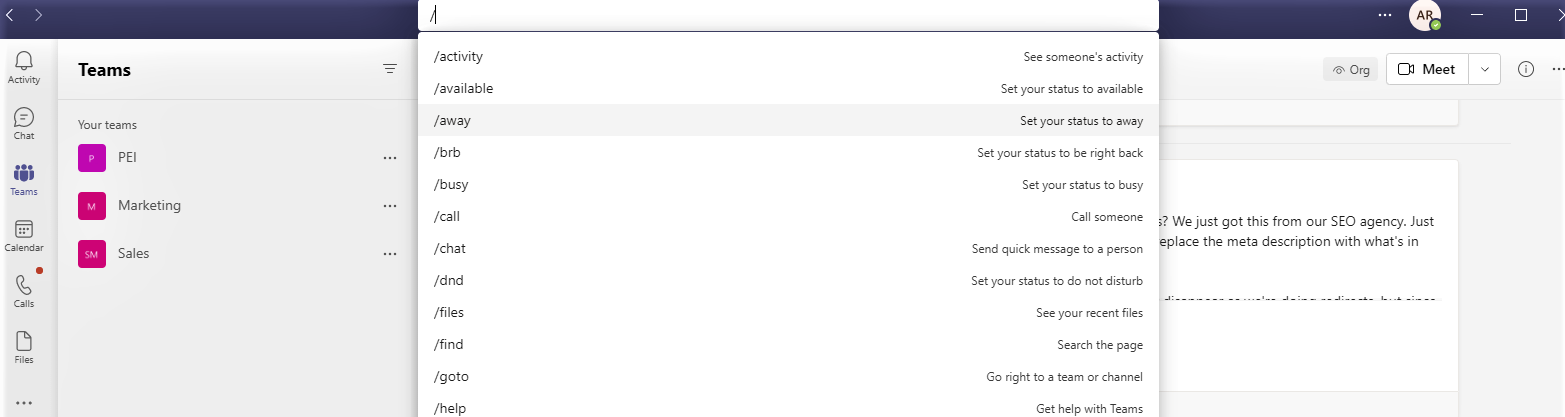
The search box at the top is also a command bar. Press ctrl+e from within Teams and your cursor will be relocated to the command bar. Press / to see a list of what you can do.
For example, you can type /away and then press enter to set your status to away. When you return, type /available and then press enter to set your status back to available. My most used command is /chat. This allows a user to send a person a message from within the search bar so you don’t have to navigate away from the current screen. Another critical command is /saved which brings up a list of saved messages.
2. Rename a Group Chat
If you’re like me, you have half a dozen group chats with a variation of the same set of team members. For ease of use, rename your group chats so you can tell at a glance which group or topic the chat is about.
From within the group chat, go to the upper left corner where the participant names are. Click the pencil icon and you will be given a box in which to type a group name. Then, the next time you want to reach out to that group of people, you can search for the group name instead of searching for all the group members individually.

3. Tag Members for Quicker Messaging
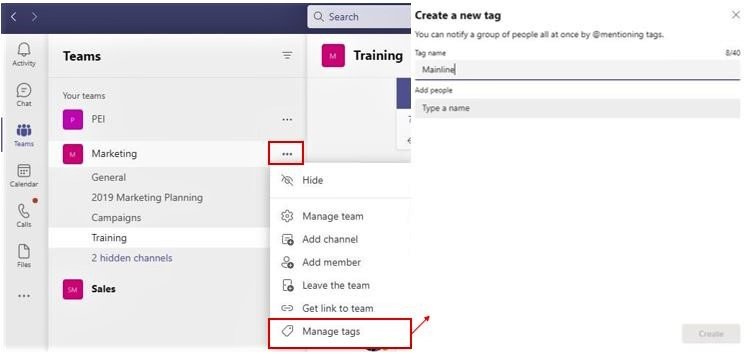
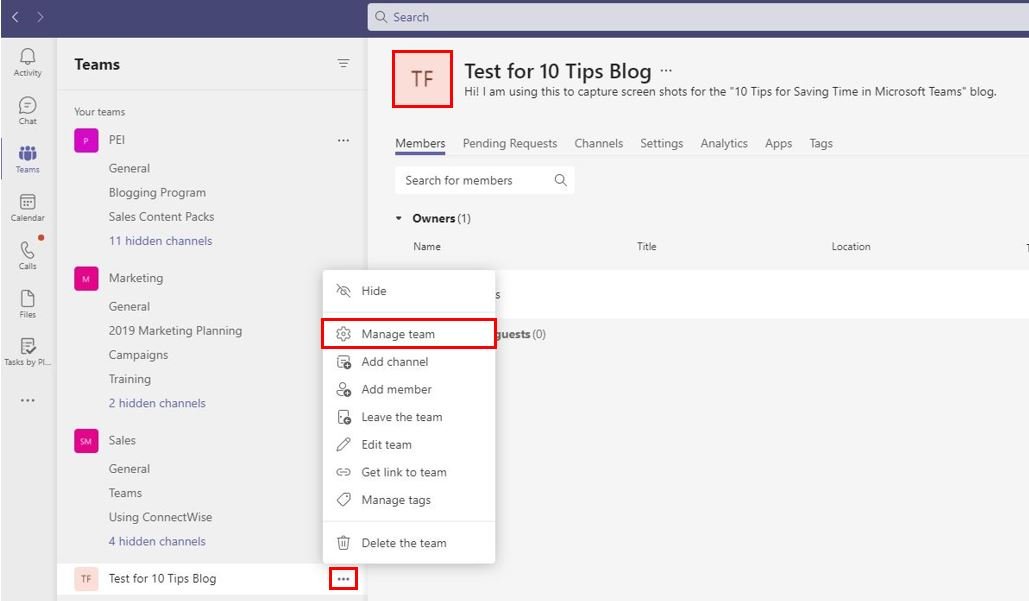
You can create a label that applies to a certain group of people so you can send many people the same message at once. From the Teams tab, find the team you want to create a tag for. Click on the ellipsis at the right of the team name and click Manage Tags. Create the tag and assign users to it. A team can have up to 100 tags, up to 100 team members can be assigned to a tag, and up to 25 tags can be assigned to a single user.
For example, we have a tag called “Mainline” so when someone needs to step away from answering the phone, they can tag @mainline and send an IM to all users responsible for answering the phone. These tags can be used for any number of things “My Fantasy Football Group,” “People working on Project A,” and so on.
4. Clean up your “Buddy List”
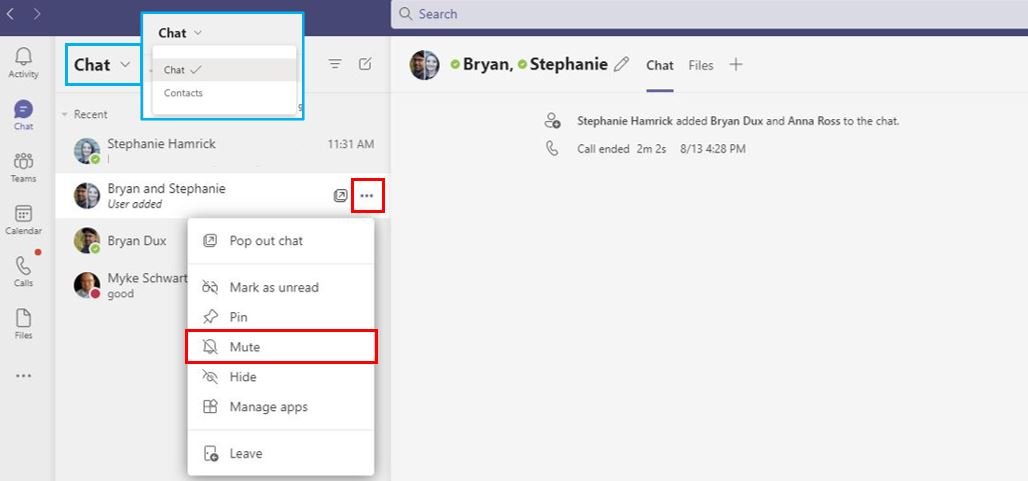
There are a few different options to customize the Chat section. First, using the down carrot next to the word Chat, you can choose between Chat and Contacts. Chat gives you a preview of the conversations you’re having from newest to oldest. Contacts looks very similar to the Skype for Business contact list and you can put people into groups and order them however you’d like.
Back in the Chat view, you have the option to mute or hide a chat. I hide chats when I’m finished with the action items so I know if my Chat list is clear, I haven’t forgotten to respond to someone. You can use the mute option, for example, if a group is chatting and you need to focus. You can mute the chat so you can continue to work without interruption.
5. Customize Notifications
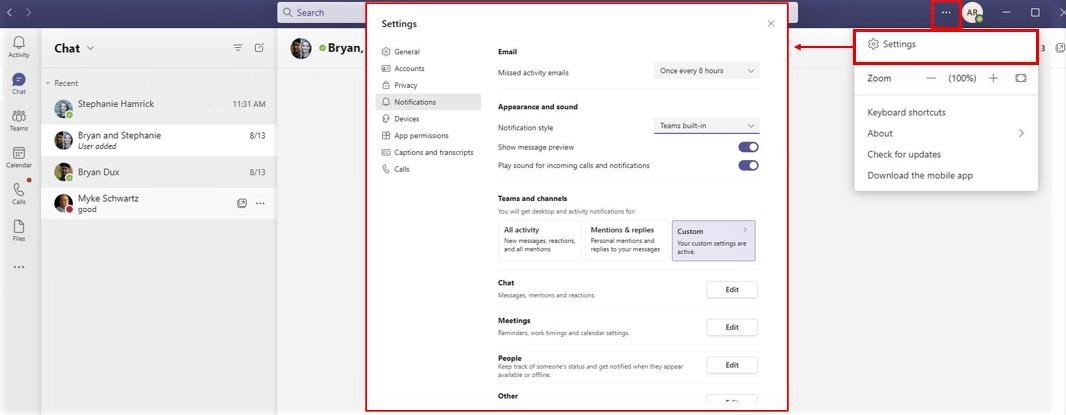
A more permanent way to control how often you’re interrupted is to customize your notifications. If there is a certain type of notification you don’t want to get, or want to get in a different way (banner pop-up vs. email) you can customize these settings by clicking on the ellipsis next to your picture in the upper right hand corner, selecting settings, and selecting Notifications.
6. Pin Apps
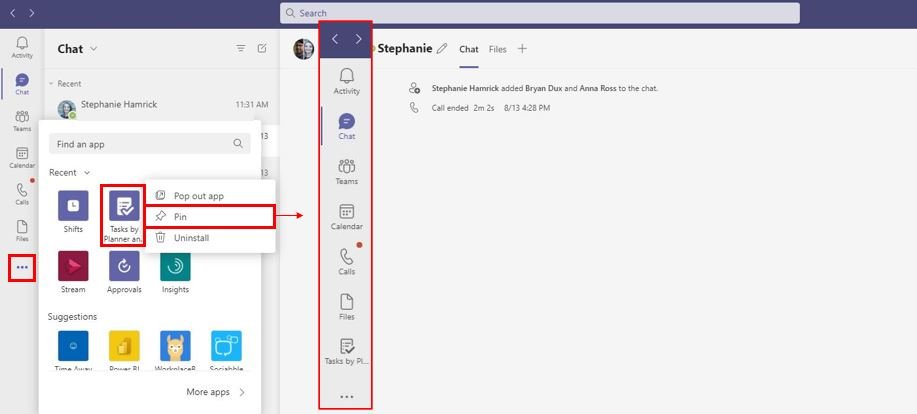
Another way to customize your Teams experience is to pin your most used apps to the left-hand side. You can do this by right clicking on the app and selecting either Pin or Unpin. You can reorder the apps on the left side by dragging and dropping. This way, you won’t have to click through to “More Apps” in order to find apps you use every day.
7. Keyboard Shortcuts
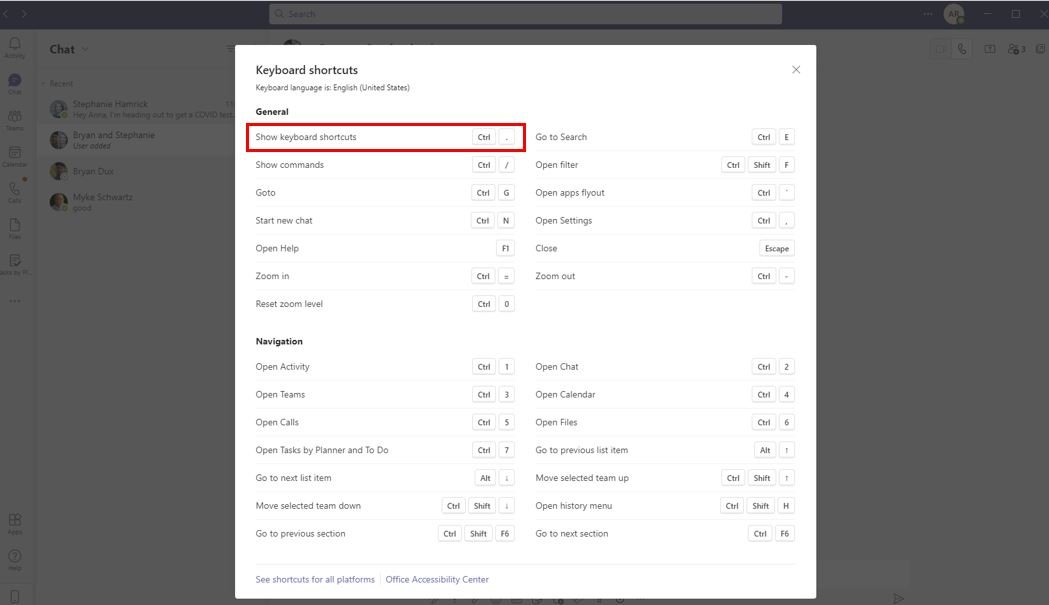
I’ve written about this topic before, but I cannot say it enough. Keyboard shortcuts are game changers. The most important keyboard shortcut to memorize is Ctrl+Period. When used from within Teams, this brings up a list of all keyboard shortcuts!
There are more than 50 available Teams Keyboard Shortcuts, so I advise taking some time to review the list to see which will save you the most time. Write a few down and pin them to your monitor until you have them memorized so it’s easier to utilize them.
8. Navigation Buttons
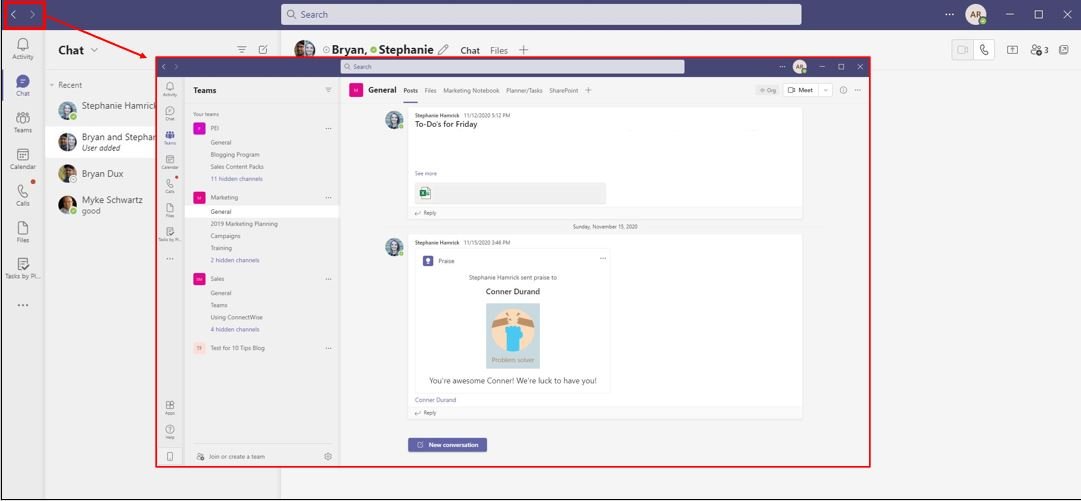
I’ve only recently discovered the Navigation Buttons and I am extremely excited to put them to work. Every week, I run a check-in meeting which requires clicking between two different screens in Teams. Before discovering the Navigation buttons, I had to return to the Team homepage each time to switch from screen to screen.
Now I just click the < > arrows in the upper left-hand corner and I can seamlessly switch between the two apps I need. This can also be used to return to what you were doing if you click out to chat with someone. Use the < button and you’re back where you were!
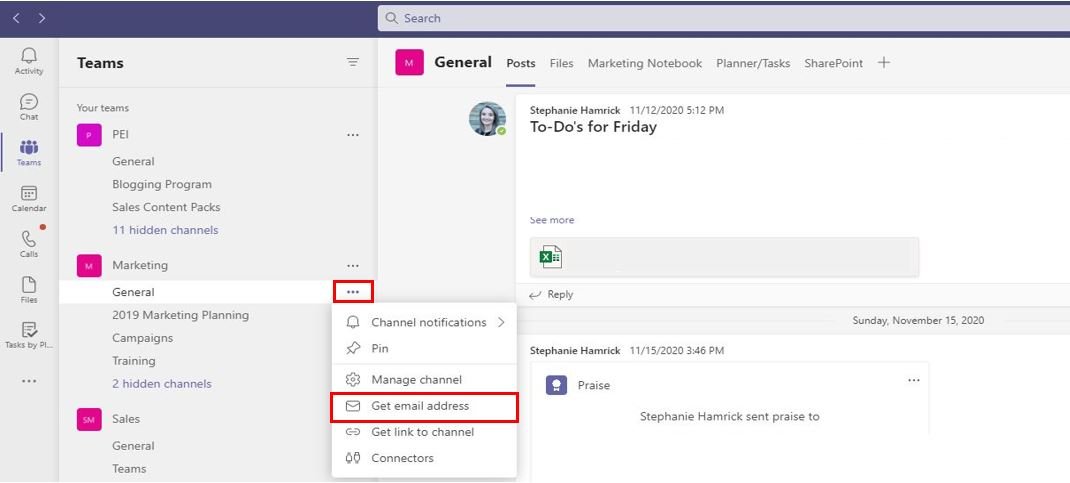
9. Send an Email to an Entire Team
Say for example you have a team that is “People Who are Attending Conference Z” and you need to send the entire team a message without adding each person one at a time to an email. You can email the whole team at once by clicking on the ellipsis to the right of the team name and selecting Get email address.
This feature can also be used to auto-upload files to the Team. Send an email with the file attachment to the Team email address and it will appear in the Posts tab. You can also send data the other way by clicking the ellipsis on the individual chat message and selecting Share to Outlook.
10. Custom Channel Images
Last but certainly not least: custom channel icons! You can bring more attention to a certain channel or chat by inserting an icon into the name. All you have to do is edit the team or group name and paste in a Unicode character. Keep in mind that everyone can see the icons you choose.
In Conclusion
There are so many more things that Teams can do. Spend some time clicking around in Teams and explore the different offerings. Every new thing you discover will help to improve your Teams experience!
Brandi-Ann, PEI