In the middle of the COVID-19 outbreak, many businesses are in a scramble to launch remote work platforms to keep their businesses running while quarantining, social distancing, and shelter-in-place orders continue to affect day-to-day life.
One thing we know is that Microsoft Teams is that remote work platform for an astounding number of these businesses, with 44 million daily users reported in recent weeks.
Remote work is becoming an increasingly viable solution for businesses of all sizes to address many business constraints. With an effective remote work policy and an enterprise-class tool like Microsoft Teams available to keep your entire team seamlessly connected, you can hire new team members no matter where they live, respond to unexpected events—like the COVID-19 pandemic—with agility, and serve clients all over the world.
PEI is a Microsoft Gold Communications Partner, so yes we’re a bit biased when we say we believe Microsoft Teams is the most intelligent, cost-effective, and powerful communication and collaboration tool available on the market today.
But, we can safely say—with 44 million daily users—that at least some people agree with us.
However, we’ve seen an astounding number of businesses launch Microsoft Teams to their end users without any formal training or change management plan in place to ensure effective adoption. This means that while users have access to Teams, they may be largely in the dark about how to use it.
The complexity of Teams is working against your business in this case—when your users are in the dark. Microsoft Teams is a powerful tool, but “powerful” to new users can often mean “too complex” or “too confusing.”
To help bridge the gap between what Microsoft Teams can do and what your users actually know how to do, we’re writing this guide that explains everything you need to know about Microsoft Teams meetings.
Skip Ahead: Find a Topic on this Page Quickly
Everything You Need to Know about Microsoft Teams Meetings
-
- The Basics About Microsoft Teams Meetings
- Who Can Join a Meeting?
- Who Can Participate in a Meeting?
- Scheduling a Microsoft Teams Meeting
- Scheduling a Teams Meeting in Outlook
- Scheduling a Meeting in Microsoft Teams
- Joining a Microsoft Teams Meeting
- Joining from Outlook
- Joining from Microsoft Teams
- Participating in a Microsoft Teams Meeting
- Sharing Your Screen
- Stopping Your Screen Share
- Give Control of Your Screen to Others
- Recording a Microsoft Teams Meeting
- Video Calls in Microsoft Teams
- Sharing and Editing Files in a Teams Meeting
- Licensing for Different Types of Teams Meetings
- More Teams Training Options
- The Basics About Microsoft Teams Meetings
One of the most essential pieces of Microsoft Teams is the ability to schedule and host online meetings. These meetings can include others in your organization or people external to your organization.
For those of you that are new to Microsoft Teams, here are some things you can do with a Teams meeting.
- Meet with anyone—even if they don’t have Microsoft Teams.
- Host and participate in HD Video Calls.
- Turn on live captions to make your meetings accessible to everyone.
- Collaborate on Meeting Notes in real-time.
- Record your meeting to watch later or send to absent colleagues.
- Send and edit files in real time.
- Share your screen and give control to others.
And this is just scratching the surface for what’s possible in Microsoft Teams.
In this article, we’ll take you through absolutely everything you need to know to quickly move from beginner to Microsoft Teams Power User. While this guide will be mostly useful for end-users, IT managers can also use it to learn more about the capabilities of Teams if you’re trying to decide on a remote work software or compare it to other solutions.
The Basics About Microsoft Teams Meetings
Here are some frequent questions we receive about Microsoft Teams meetings.
Who Can Join a Microsoft Teams Meeting?
Anyone can join a Microsoft Teams meeting—no “ifs”, “ands”, or “buts” about it.
The only things your invitees must have are an email address and access to an internet browser—so I guess there are “ifs,” though hopefully we all agree the bar is pretty low here. Additionally, they’ll need a pair of headphones with a microphone to speak and a video device (the built-in web cam on their computer will work just fine) if they want to turn on their video.
Your invitees do not need to have the Microsoft Teams app—or even a Microsoft account—they can click on the Join Microsoft Teams Meeting link in the email invite to join the meeting. Their default browser will launch and they’ll be connected to your meeting.
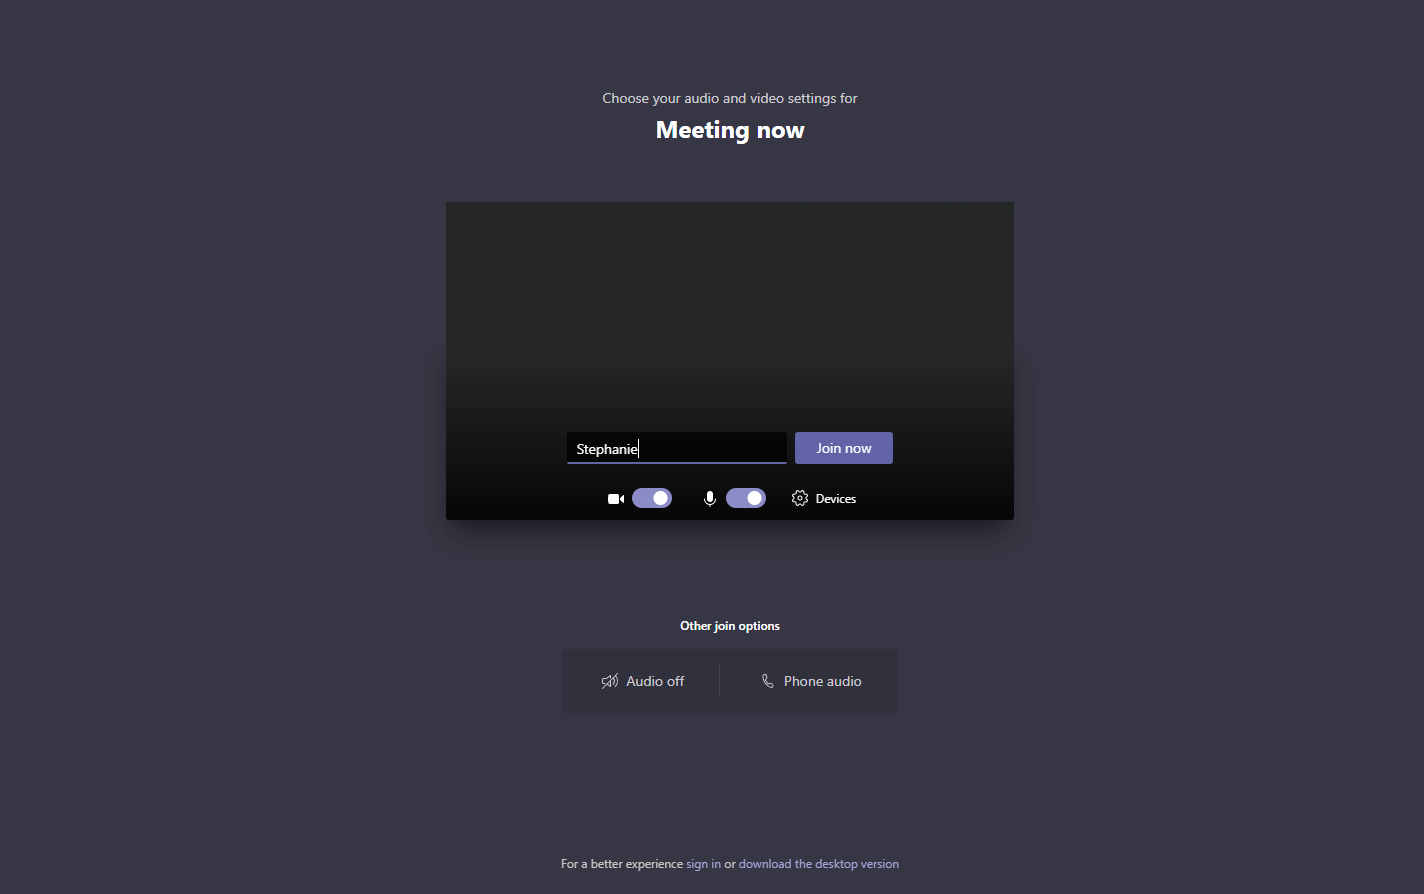
It’s quite simple with no annoying plugin downloads or hoops to jump through—we’re looking at you, Zoom. They can just click to Allow audio and video access, enter the name they want displayed in the meeting, and click Join Now.
Who Can Participate in a Teams Meeting?
Anyone can participate in a Teams meeting—okay we’ll admit up front on this one that there are a few “ifs,” “ands,” and “buts.”
This question may sound pretty similar to the last question, but we’ve decided to cover them separately because this aspect is confusing to many new users.
If your invitees don’t have the Microsoft Teams desktop app, but they join through a browser as mentioned above, they still have access to nearly all the major features of Teams meetings as someone joining from the desktop app with a Teams account. Using any of these features is what we’re calling “participating in the meeting”
When joined from a browser, anyone in your Microsoft Teams meeting can
- Send and receive chat messages.
- Speak through their microphone to participate in the call.
- Start or stop their own video to participate in a video call.
- View shared content (screen share, shared files).
When joined from a browser, external users (not in your organization) in your Microsoft Teams meeting cannot
- Start the meeting recording.
- Blur their video background.
- Be given control of someone’s desktop during a screenshare session.
- Upload or share a file.
- Use emojis, gifs, etc.
When joined from a browser, external users in your Microsoft Teams meeting can sometimes
- Share their own screen (if using Google Chrome or Microsoft Edge Chromium; all other browsers still allow users to see screens that are being shared).
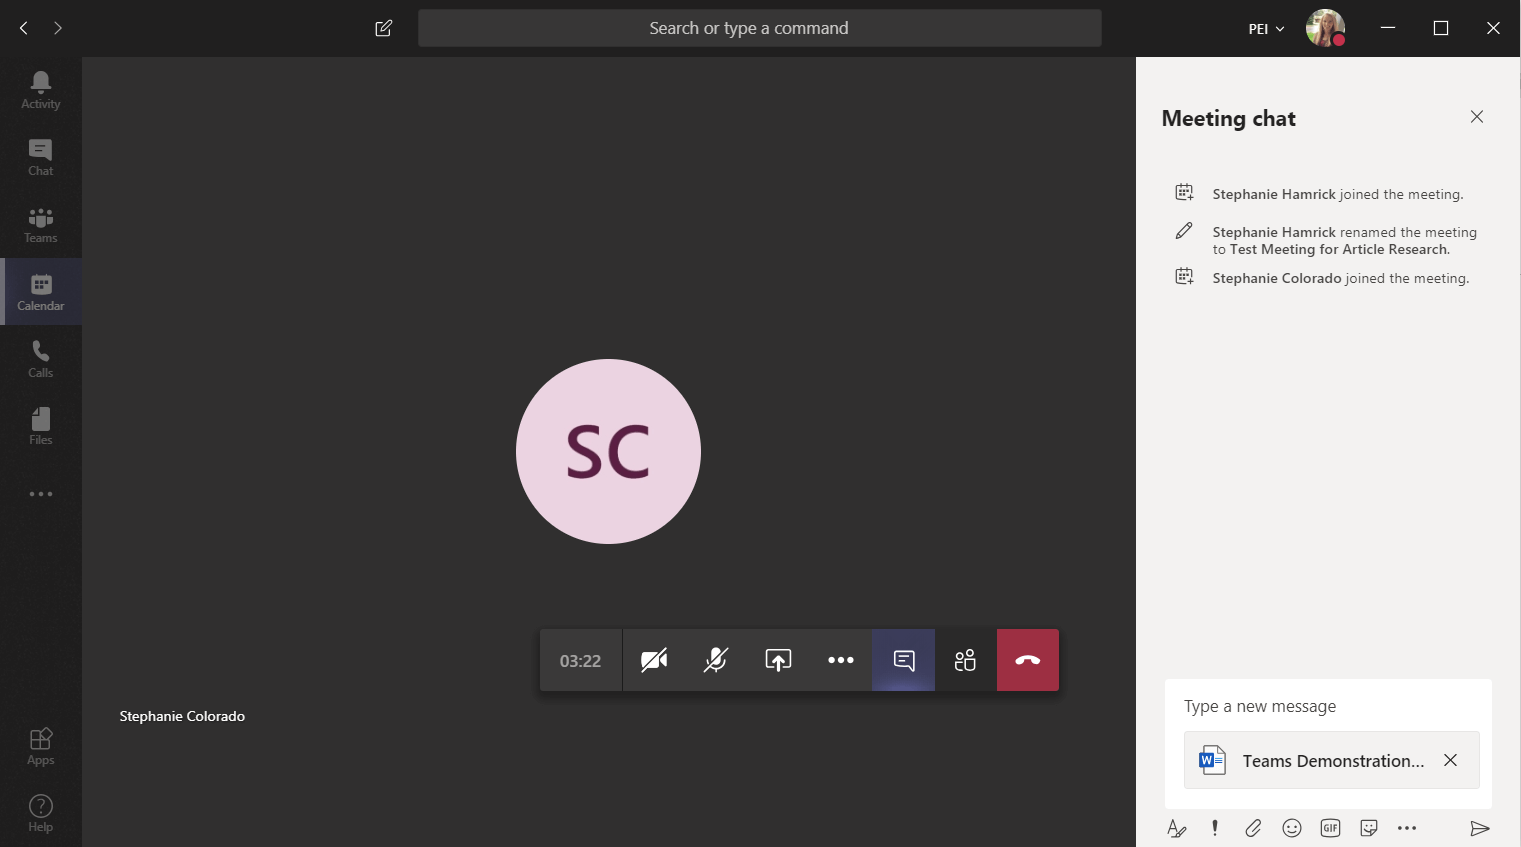
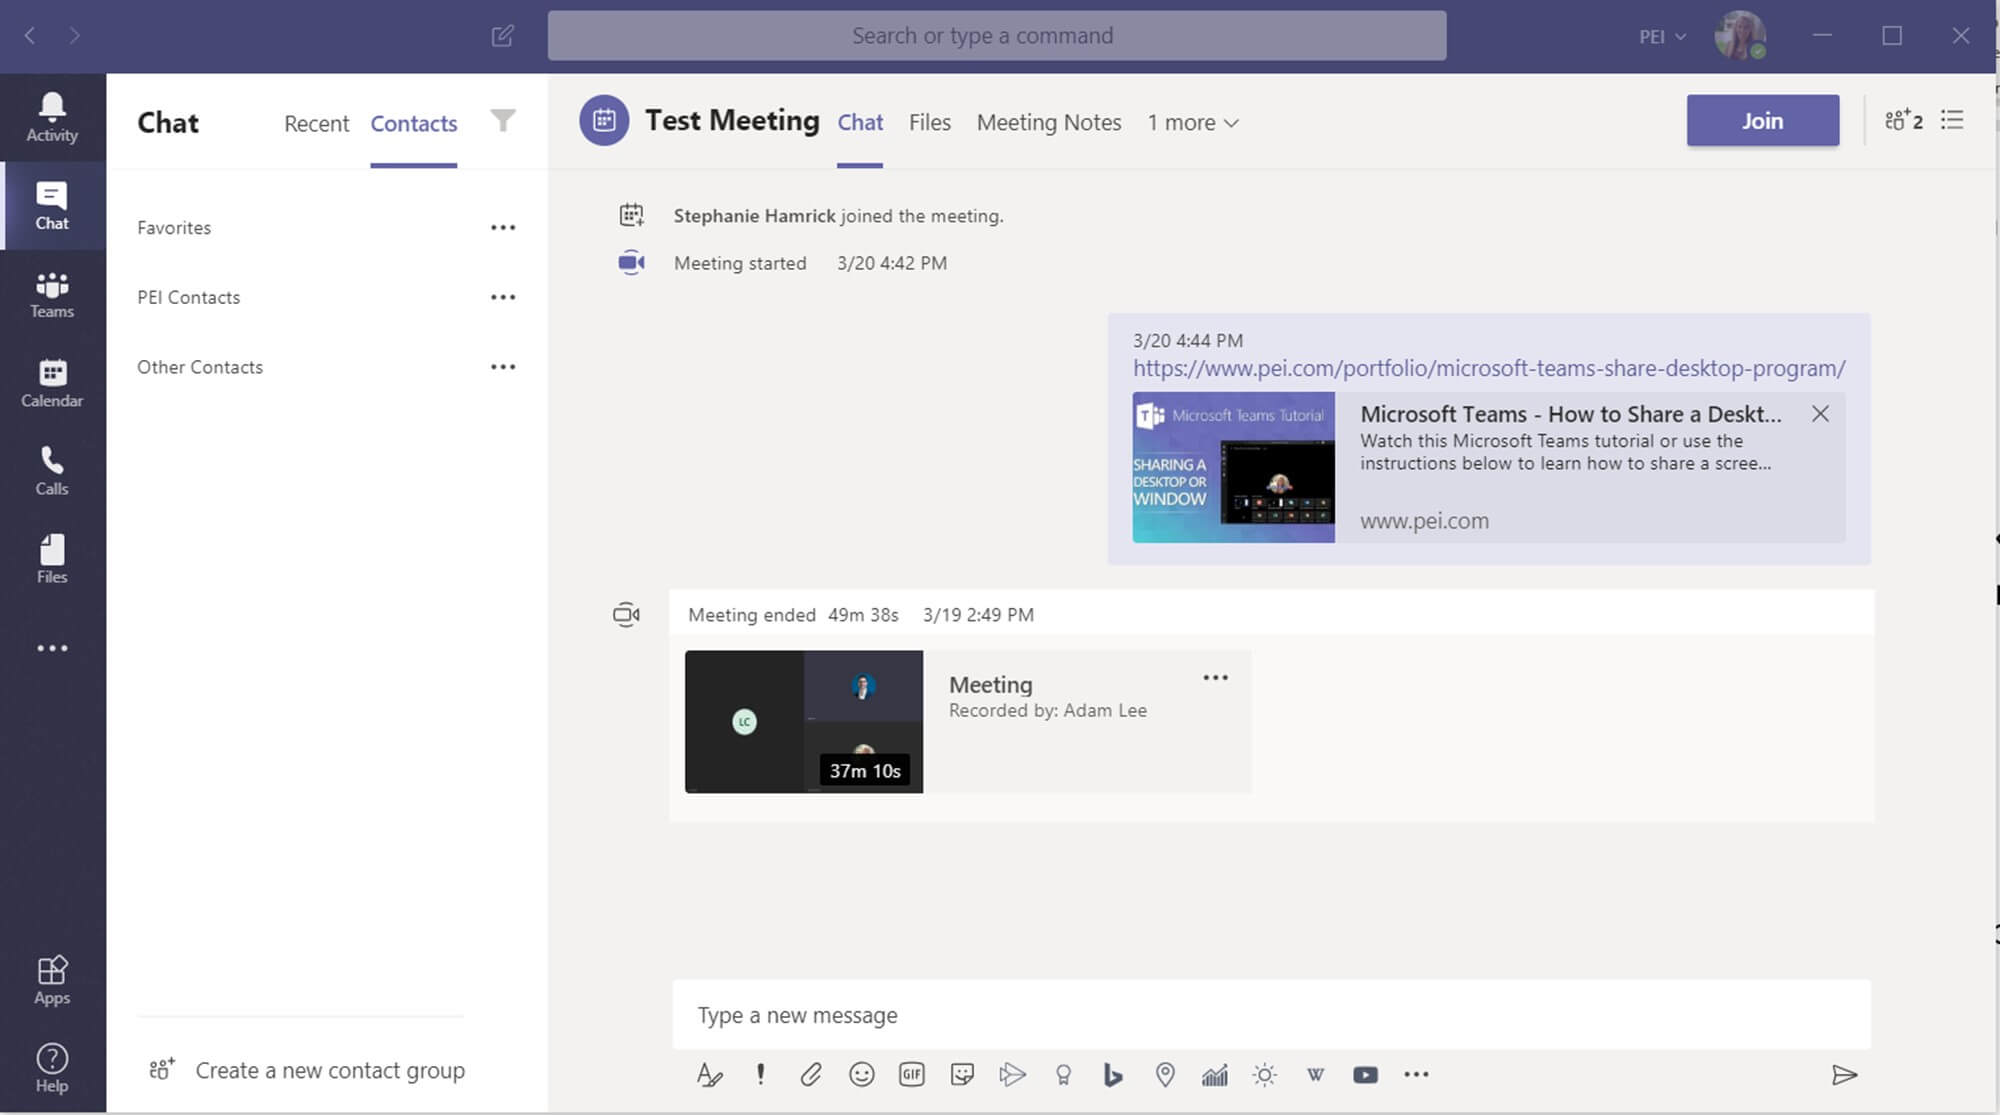
Here’s what a Microsoft Teams meeting looks from your side when an external user has joined from a browser.
Here’s what that same meeting looks like to the external user who joined from Google Chrome.

Scheduling, Joining, and Participating in Microsoft Teams Meetings
The content in this section will refer mostly to internal meetings using the Microsoft Teams desktop app.
As you learn about using Microsoft Teams, keep in mind some of the limitations specified in the previous section of this article. Some features are unavailable to users based on if they’re internal or external to your organization or joining on the desktop app or through a web browser.
And on top of this, specific features and permissions can be turned off by your IT admins.
Scheduling a Microsoft Teams Meeting
Scheduling a Teams Meeting in Outlook.
If you have Office 365, then Microsoft Teams and Outlook are automatically integrated. This gives you a ton of cool features, which we don’t have time to cover today—comment below if you want to see a post on this—but one of these features is the ability to schedule a Microsoft Teams meeting right from Outlook.
- From the left-hand side of the ribbon in Outlook select New Item.
- Then from the drop-down options, select Teams Meeting.

- Fill out the meeting details by giving your meeting a title, filling out required or optional attendees, selecting a time and date, and writing some details about the meeting in the body of the message.
- Choose Scheduling Assistant from the top of the ribbon to help you find a time where everyone is available.
- Click Send to schedule your meeting and send your email invitation(s).
Scheduling a Meeting in Microsoft Teams
You can also schedule your meetings directly in Teams. One advantage of scheduling a meeting in this way is that you can specify a team and channel to meet in—more on this later.
- In Teams, select Calendar from the left app pane.
- Select the New Meeting button from the top-right corner.

- Fill out the meeting details by giving your meeting a title, filling out required or optional attendees, selecting a time and date, and writing some details about the meeting in body.
- Choose the Scheduling Assistant tab to help you find a time where everyone is available.
- Click Save to schedule your meeting and send the email invites.
Let’s talk about the differences of scheduling your Teams meeting in Teams vs. in Outlook.
First, you won’t see the Join Microsoft Teams Meeting link in the body of your meeting. Don’t worry though, this will be added to the email invitations that go out once you save and officially schedule the meeting.
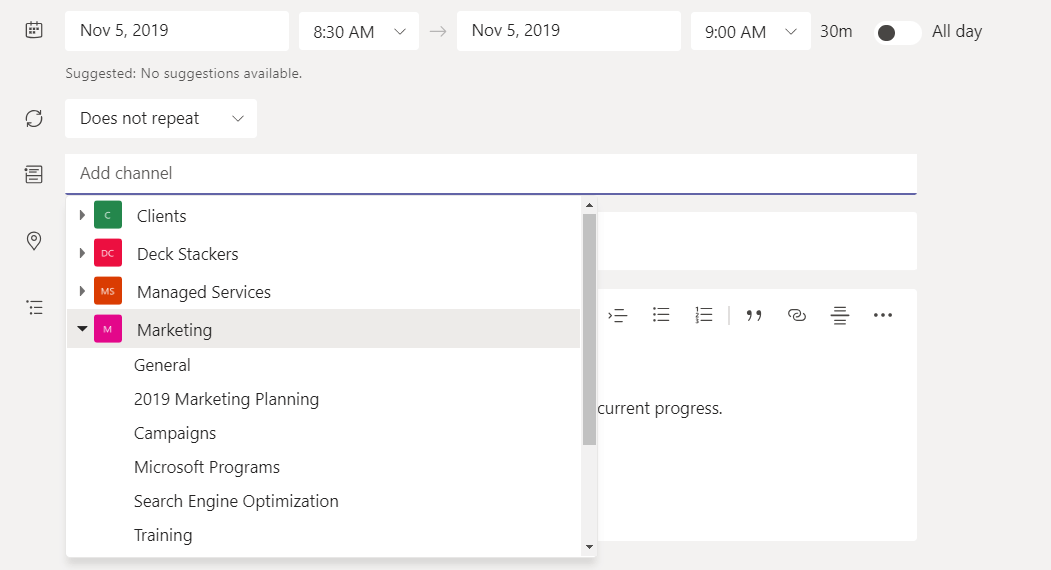
Second, you have the ability to Add a Channel to your meeting. This allows you to tie your meeting to a specific Team and Channel that you’re a member of in Microsoft Teams.
You first pick the Team you want your meeting connected to and then the specific channel inside of that Team that you want to meet in.
The Difference Between a Private Meeting and a Channel Meeting in Microsoft Teams
This is one aspect that can trip up even very experienced Microsoft Teams users.
If you do not add a channel to your meeting, you’re having a Private Meeting. If you do add a channel, you’re having a Team Meeting or Channel Meeting. This essentially means that this meeting is happening within a specific Team.
Here are the differences:
Difference One: Who Can See and Attend the Meeting?
With a private meeting only people with the meeting link sent in your meeting invite can attend. Keep in mind this link can be forwarded to other people. This is best for when you want to invite people outside of your organization or your meeting isn’t relevant to any of your teams.
With a channel meeting, anyone in that team can join the meeting, whether they’ve been specifically invited (included in the Required or Optional fields) or not. The contacts you include in the attendee fields will get email invitations to your meeting, but everyone else in the Team will receive a notification in Teams that a meeting is happening.
This also means that you cannot invite anyone who’s not in the team you select to meet in. (Note: external users can be added as guests to teams in Teams, but this shouldn’t be done unless absolutely necessary.)
Difference Two: Where is Meeting Information Stored?
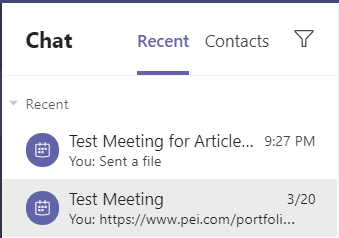
Regardless of the type of meeting you have, Teams stores all of the important meeting information even after the meeting’s ended, so you never loose track of anything.
When you have a private meeting, this information will be saved in a private conversation over on the chat tab. Any IMs, files, meeting recordings, etc. will be saved in this private conversation.
When you have a channel meeting, all of that information is stored in the team space, so everyone in your team can see what was accomplished and catch up if they need to.

When deciding on whether to include a channel on your meeting invite, keep these two important differences in mind.
Joining a Microsoft Teams Meeting
Joining a Microsoft Teams Meeting from Outlook
- Open the meeting by double clicking on the item from your Outlook calendar.
- Select Join Microsoft Teams Meeting from the ribbon or from the body of the invite. Both links take you to the meeting.

These instructions are for Outlook, but any invitee can join from the Join Microsoft Teams Meeting by opening the email invite they received and clicking on the link.
Join a Microsoft Teams Meeting from Microsoft Teams
- Select the Calendar app from the app pane on the left.
- Click on the meeting you’d like to join.
- Click the Join button in the top-right corner or the Join Microsoft Teams Meeting link from the meeting details.

This screen might look slightly different if you’re the meeting organizer, but you’ll still have both join options.
Once you click to join a Teams meeting, you’ll see a screen that looks something like this.

Use the toggles (from left) to turn your video on or off, blur or unblur your video background, or mute or unmute your microphone. Select the gear icon to see the settings pane on the right and select your speaker, microphone, or video devices before you enter the meeting.
You can also make a quick test call to test your audio using the Make a Test Call button if you’d like.
Participating in a Microsoft Teams Meeting
We’re going to level with you right now. There are so many things you can do in a Teams meeting, that we can’t possibly cover them all here. (So I guess we have to admit this post doesn’t quite cover absolutely everything you need to know for a Teams meeting. Forgive our ambitious title.)
But, we’re still going to cover what we think are the most widely used features and discuss some of the most commonly confused details. Let us know if there’s something else you want us to cover in the comments below—using live captions, taking meeting notes, etc.—and we’ll try to add your requests to this article!
Reminder: some of these capabilities depend on if you’re using the desktop or web (browser) apps, your specific Office 365 license, and the limits set up by your IT admin.
How to Share Your Screen in a Microsoft Teams Meeting
We have a video demonstrating how to share your screen in a Teams meeting, and we recommend stopping over there to learn more.
Here’s the cliff notes version:
- Select the Share Content
 button from the meeting options.
 - Select the desktop or program you’d like to share.
- Select the check box next to Include System Audio if you’d like attendees to hear system audio from your computer, e.g., if you wanted to show a video.

The Difference Between Sharing Your Desktop and Sharing a Window
When you click to share your desktop in Teams—if you have more than one monitor, you’ll be able to select one to share from this list—anything on your screen will be visible to meeting attendees. This means that any embarrassing notifications or sensitive data that pops onto your screen by accident will be visible.
When sharing, Teams will automatically put your status in Do Not Disturb mode. This will silence most notifications on your computer, but some—like those from a browser—can still make their way through.
However, if you’re planning to switch between multiple programs and windows, this method will allow you to do so easily.
When you select a window from the Window list, only that specific window will be visible to meeting attendees. Any other window (even if it’s from the same program) that pops up over your chosen window will appear blacked-out to any viewers. This is a good way to protect sensitive data and ensure you’re not accidentally sharing anything you hadn’t planned on sharing.
One downside of this method is that you will need to stop sharing, then start a new share to be able to share a different window.
Only one person can share their screen at a time in Microsoft Teams.
How to Stop Sharing Your Screen in a Teams Meeting
At any time, stop sharing your screen by clicking the Stop Sharing button, which will have replaced the Share Content button. This button is also on the meeting options flyout window what will appear at the bottom right when your screen is being shared.

How to Give Control of Your Screen in a Teams Meeting
Remember that one of the limitations in Teams is that you can’t give control of your screen to users who are joined via the web app. They need to be using the desktop version of Teams.
- Share your screen in the Teams Meeting.
- Drag your mouse to the top of your screen to display the sharing toolbar.
- Select Give Control from the toolbar and select a meeting attendee from the dropdown.

- Repeat these steps to take control back. (Instead of Give Control, you’ll see Take Back Control on the toolbar.)
One important piece to note is that anyone who has control of your screen will not be able to perform any actions that require administrative permissions—such as changing security settings on your device.
How to Record a Microsoft Teams Meeting
There are restrictions on who can record a Microsoft Teams meeting. Only meeting attendees who are part of your company (internal users) can start the meeting recording. This recording will include any video and screensharing from the meeting. This is also a feature that is commonly turned off by IT admins, so make sure to ask your IT department if you don’t see this feature.
- From your meeting, click the Ellipsis Icon from the meeting options.
- Select Start Recording from the list.

To turn off the recording follow these same steps, except choose Stop Recording from the list.
If you read through the section on how to schedule a meeting, then you’ll know that the recordings you make in Teams will be stored either on the Chat Tab for private meetings or in the team your meeting took place in (if it was a channel meeting).
These recordings are not stored on Files tab of your team. Instead, find the meeting in the Posts tab and the meeting recording will live in the replies. The recording also lives in Microsoft Stream, where you can see all the recordings you’ve made, download them, or edit permissions for who can view them.

Working with Video in a Microsoft Teams Meeting
In Microsoft Teams, you can easily turn any conversation into a video conference call by clicking the video icon. Here are some details about using video in Microsoft Teams meetings.
To turn on your video or blur your background before joining a meeting
- Join the meeting from Outlook or Teams.
- On the Join Screen, select the toggle next to the Video icon to turn your video on or off.
- You’ll see a preview of your video.
- The toggle to the right of the video icon allows you to blur your background before joining the meeting.
- Select your device settings to change your selected camera device if you have multiple.
- Click Join to join the meeting.

To turn your video on or blur your background after you join a meeting
- Click the video icon from the left side of the meeting options.
- To start your video with a blur, select the Ellipsis icon from the meeting options and select Start Video with Blur.

You can use these same steps to stop your video or unblur your background at any time during a meeting.
Microsoft Teams Video Call Layout
As of the time of writing this, Microsoft Teams allows you to view the video of four users at a time—though rumor has it they will soon update this to allow for nine users on the screen at the same time. If you have more users with their video turned on during a meeting, they will be listed at the bottom right of the meeting window.
As users speak, their video will appear in one of the four main spaces. So, you’ll always be able to see those who are currently speaking.
If there is a user you want to always appear in one of the four main spaces, you can pin that user to the meeting screen.
Pin a User to the Teams Meeting Screen to Always See their Video.
You can pin up to four users to your Teams meeting screen so that their video never disappears.
- In your meeting, hover over the user you want to pin.
- Select the Ellipsis icon next to their name.
- Select Pin.
- This will always keep your user visible in the main meeting space.

Sharing and Editing Files in a Microsoft Teams Meeting
This aspect of Teams meetings takes you from boring conference call to true collaboration space. This topic on its own could take up a whole blog post—or you can learn more about it in our online training portal called—so we’re just going to cover the basics.
First, you should know that files you upload to Teams will be saved for you in Office 365. If you have a private meeting, then your file will be uploaded to your OneDrive and made accessible in the Files tab of the meeting conversation from Teams. This cloud version of the document will be editable by anyone from the original meeting invite list.

If you share a file to a meeting in a channel, that file will be uploaded to SharePoint and made accessible in the Files tab of that team channel. This version of the document will be editable by anyone in your team.

In either type of meeting, you and your meeting participants (internal users) can edit files you share in real time.
To Share a File in a Microsoft Teams Meeting
- Click the Chat icon from the meeting options toolbar.
- In the Chat pane, select the Attachment
- Select the location you want to pull the file from—your computer, OneDrive, a Team. (These options will vary if you’re in a private or channel meeting)
- Click the Send icon (paper airplane) to send the file to the rest of the participants in the meeting.
To Edit a File in a Teams Meeting
We recommend you see our video on editing files in Teams for more details on how to work with files in Teams.
- After a file has been shared in your Teams meeting, open the Chat pane by clicking on the Chat icon from the meeting options.
- Click the Ellipsis icon next to the file to see editing options.
- Select Edit in Teams.

- Teams will open your file while you’re still in the meeting (each member of the meeting who wants to edit the file will need to do so separately).

This allows you to edit Office files in real time, meaning as each person in your meeting opens the file and begins typing, you’ll see the changes as they occur. This takes collaboration to the next level and saves time while working on important files.
Licensing for Different Types of Microsoft Teams Meetings
Microsoft Teams allows any user to host online meetings. However, if you’re looking for a true conference calling system that allows people to call into your meeting using their phones, you’ll need to make sure you have an Audio Conferencing license.
Teams Meetings Types According to Licensing
Teams Meetings without an Audio Conferencing License
With Office 365, any Microsoft Teams user can schedule and host online meetings. This means that anybody can join the Teams meeting and use most Microsoft Teams features—video calling, screensharing, chat, etc.
Teams Meetings with an Audio Conferencing License
However, with an Audio Conferencing License, users will be able to host Teams Meetings that include both dial-in and dial-out capabilities.
If you’re new to audio conferencing, Microsoft Teams, or VoIP solutions, or, you may not be familiar with the terms “dial-in” or “dial-out.”
Dial-in capabilities allow attendees to dial into the conference bridge from any phone.
Dial-out capabilities allow the meeting to dial out to attendees to bring them into the meeting, e.g., “call me at” options for connecting audio devices.
Joining in either of these ways means the meeting will be audio only (attendees won’t be able to see any video or screen sharing that’s happening in the meeting). However, this can allow users to join from any device—if they’re on the go or if they have a bad internet connection.
An Audio Conferencing license can make meetings more accessible by allowing users to join from a regular phone vs. requiring them to join on a computer. Each user will get 60 minutes a month and these minutes will be used anytime users use the dial-in or dial-out capabilities.
If your users need more than 60 minutes, you’ll need to purchase communication credits. For more information on Microsoft Teams licensing, visit our Complete Microsoft Teams Licensing Guide.
Not Sure if You Have an Audio Conferencing License?
When you schedule a Teams Meeting and you have an Audio Conferencing License, you’ll see the dial-in details at the bottom of your meeting invite. If you don’t have an audio conferencing license, you’ll only see the “Join Microsoft Teams Meeting” link.

If you don’t have an Audio Conferencing license, you can still host meetings for anyone with an email address, access to a web browser, and a pair of headphones with a built-in microphone.
Need to Learn More About Microsoft Teams?
This post is long, so if you’ve made it all the way down here, congratulations! While this article may include everything you need to know about Microsoft Teams Meetings, there are still several more tabs on the left-hand toolbar to master before you’re a true Microsoft Teams power user.
Microsoft Teams is powerful, but this power is limited by how well users know the tool.
We offer Microsoft Teams training online through our training portal called QuickHelp. In this program, you’ll find short videos, downloadable guides, and competitive elements to keep you engaged. These structured, self-paced courses can take you and your colleagues from beginners to advanced users with just a few minutes each day
If your business needs to learn Microsoft Teams fast, check out QuickHelp.
Stephanie Hamrick, PEI