

Sometimes Exchange can be a little overzealous in protecting you from spam and other unwanted email. To make sure messages get through, you can whitelist email addresses in Microsoft 365.
We get this question a lot from IT Pros and people just getting started in the Microsoft 365 Admin center. If you’re not an Office 365 admin, you can use our end-user instructions for whitelisting email addresses from Outlook, here.
How to Whitelist Email Address in Microsoft 365:
- Log into the Microsoft Defender Admin Center: https://security.microsoft.com/
- In the Email & Collaboration section on the left-side panel, select Policies & rules, then Threat Policies.
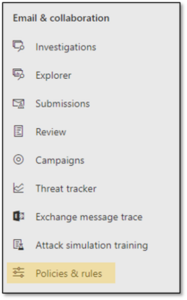
- Select Anti-Spam from the Policies section.

- Choose the Anti-spam inbound policy (default).
- In the flyout pane, scroll down to the Edit allowed and blocked senders and domains link.

- Click on the Manage Senders or Allow Domains link and type in the addresses or domains you’d like to allow.

- Make sure to press the Add button and then the Save button to save your changes to the policy.
Once you save the policy, it may take up to an hour for the changes to take effect. After that, the emails from the whitelisted senders or domains will be delivered to your inbox without being scanned or filtered by Defender.
Creating an allow policy in the Microsoft Defender admin center can help you avoid missing important or trusted emails that may otherwise be blocked or filtered by the default security settings. However, whitelisting also comes with some risks, as it bypasses the protection mechanisms that Defender provides against spam, phishing, malware, and other threats. Therefore, you should carefully weigh the pros and cons of whitelisting an email address or domain, and only do so if you are confident that the sender or domain is trustworthy and reliable. Whitelisting should not be used as a substitute for good email hygiene and security awareness, but rather as a complementary tool to enhance your communication and collaboration.
Bypassing Spam in Microsoft 365
For specific domains or IP addresses, Microsoft prefers whitelisting to be done from the Defender or Security Admin centers as detailed in the instructions above. If you’re facing a problem where mail is still being marked as spam, you can use mail flow rules in the Exchange Admin Center to bypass spam filtering and fix this problem. One situation where this is common is if you have mail coming from an on-premises Exchange going to Exchange Online. Here are the steps you’ll need to take to bypass such spam filtering:
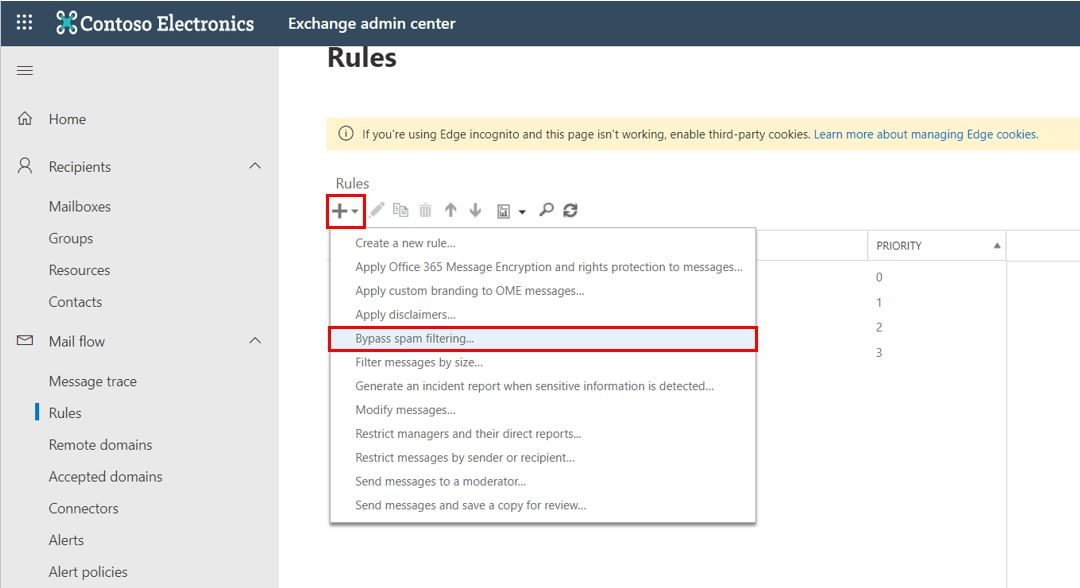
- Open the Exchange Admin Center.
- Click on the Mail Flow drop-down and select Rules.
- Add a new rule for Bypass Spam Filtering.
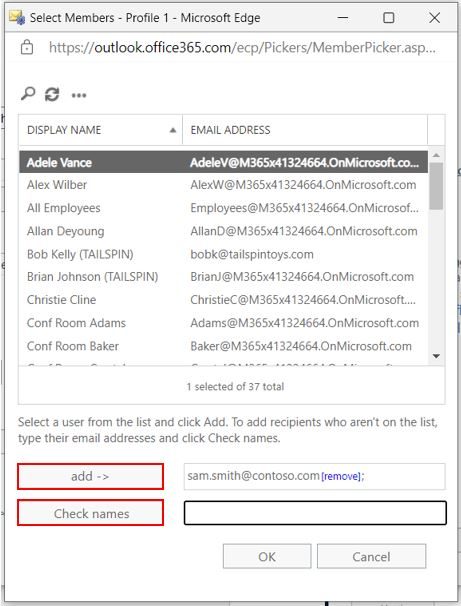
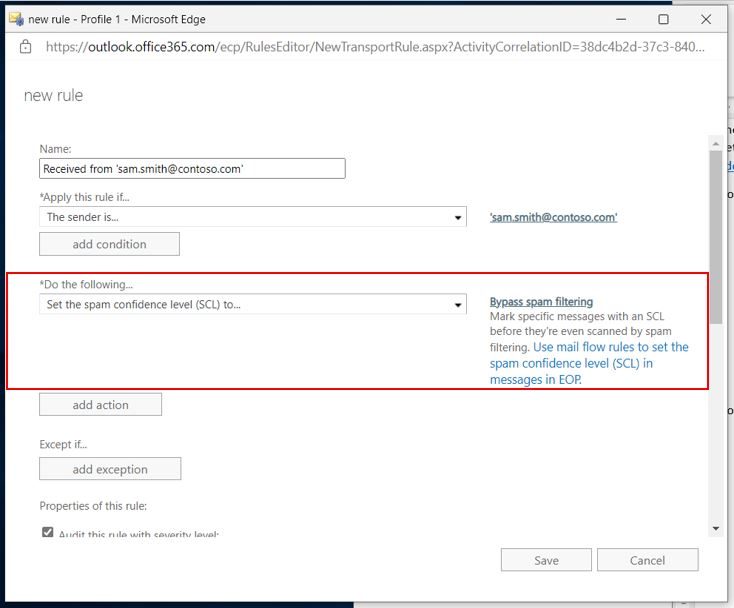
- From the Apply this rule if… drop-down, select the sender… > is this person.
- In the field to the right of the Check names button, type the email address you want to allow.
- Click the Check names button to move your address to the Add – > field.
- Click the Ok button to exit the flyout window.
- In the Do the following… field, Set the spam confidence level (SCL) to Bypass Spam Filtering should automatically be selected.
- Click Save to apply the policy.
How to Whitelist an email domain in Office 365:
- Open the Exchange Admin Center.
- Click on the Mail Flow drop-down and select Rules.
- Add a new rule for Bypass Spam Filtering.
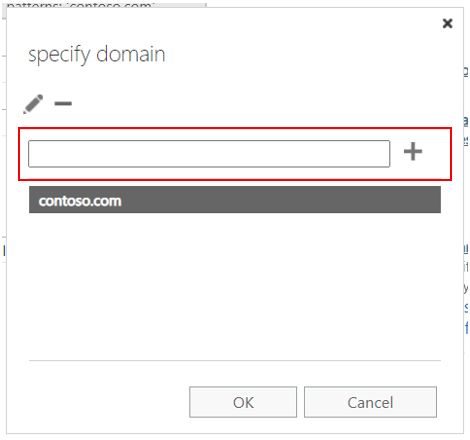
- From the Apply this rule if… drop-down, select the sender… > domain is.
- Type the domain in the Specify Domain flyout window and click the Plus button to add the domain to your policy.
- Add additional domains here or click Ok to exit the flyout window.
- In the Do the following… field, Set the spam confidence level (SCL) to Bypass Spam Filtering should automatically be selected.
- Click Save to apply the policy.
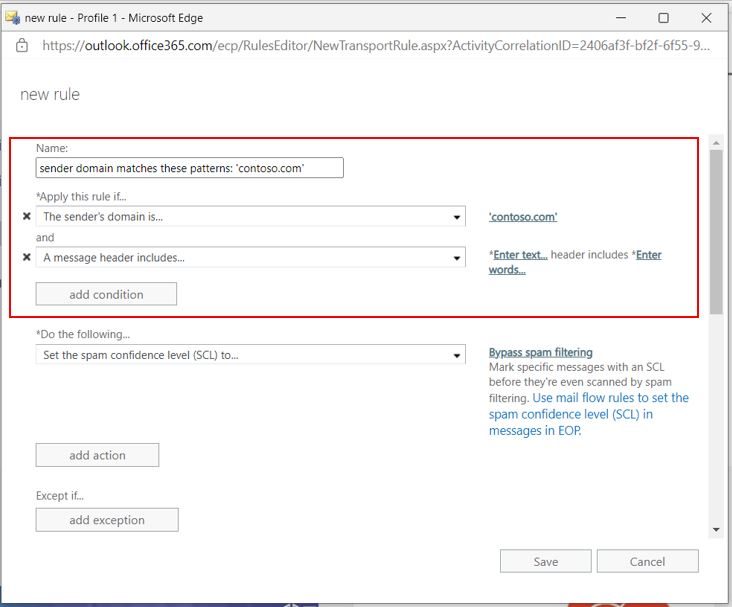
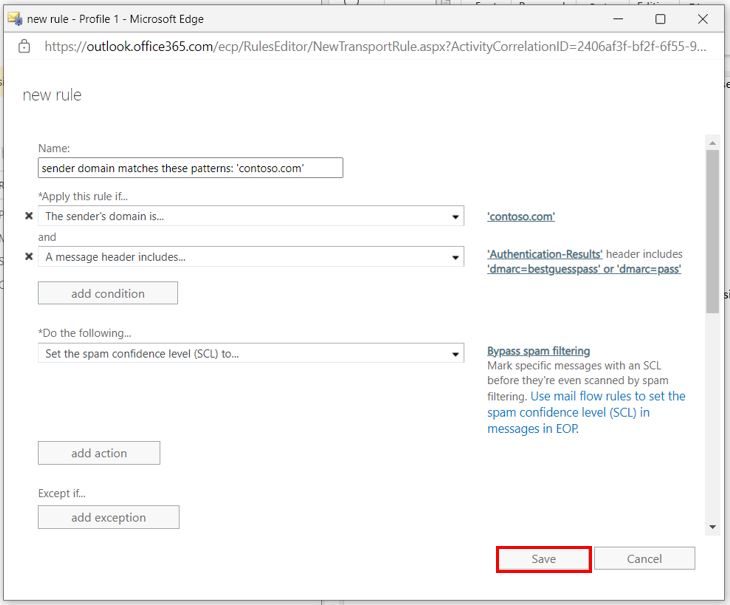
Keep in mind that whitelisting domains in Microsoft 365 can leave your organization vulnerable to threats from accounts that spoof the allowed domain. To mitigate some of this risk, we recommend adding an additional condition that checks if the message was sent from the domain’s registered servers:
- From the drop-down, select A message header… > includes any of these words.
- Click the Enter text… hyperlink and specify the header name as Authentication-Results
- Then select the Enter words… hyperlink and add dmarc=pass and dmarc=bestguesspass to the Specify words or phrases list as separate entries.
- Click Ok to exit the flyout window and save your phrases.
- Click the Save button to save your rule.
More Detailed Instructions to Whitelist an Email Address in Microsoft 365:
- Sign into Office 365: Go to portal.office.com and sign in with an Office 365 admin account.
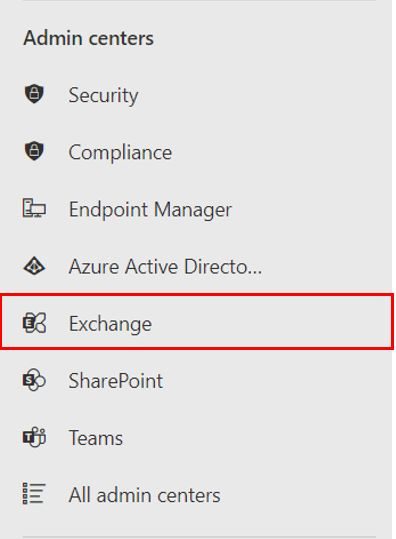
- Select Admin from your list of apps.

- Click the Show All link on the right-hand navigation pane and choose Exchange from the list of admin centers.
- Click on the Mail Flow drop-down and select Rules.
- Click the + button to create a new rule and select Bypass Spam Filtering.
- From here, you’ll need to decide if you’re whitelisting a single email address or an entire domain.
Whitelisting a single email address is the safest course of action, since whitelisting an entire email domain allows malicious actors to spoof any address on the allowed domain to deliver spam and phishing messages directly to user inboxes.
For a Single Email Address:
- From the Apply this rule if… drop-down, select the sender… > is this person.
- In the field to the right of the Check names button, type the email address you want to allow.
- Click the Check names button to move your address to the Add – > field.
- Click the Ok button to exit the flyout window.
- In the Do the following… field, Set the spam confidence level (SCL) to Bypass Spam Filtering should automatically be selected.
- Click Save to apply the policy.
For an Email Domain:
- From the Apply this rule if… drop-down, select the sender… > domain is.
- Type the domain in the Specify Domain flyout window and click the Plus button to add the domain to your policy.
- Add additional domains here or click Ok to exit the flyout window.
- In the Do the following… field, Set the spam confidence level (SCL) to Bypass Spam Filtering should automatically be selected.
- Click Save to apply the policy.
*Whitelisting an entire domain can leave your organization vulnerable to threats from accounts that spoof the allowed domain. To mitigate some of this risk, we recommend adding an additional condition that checks if the message was sent from the domain’s registered servers:
- Click the Add Condition button under the Apply this rule if… header.
- From the drop-down, select A message header… > includes any of these words.
- Click the Enter text… hyperlink and specify the header name as “Authentication-Results”

- Then select the Enter words… hyperlink and add dmarc=pass and dmarc=bestguesspass to the Specify words or phrases list as separate entries.

- Click Ok to exit the flyout window and save your phrases.
- Click the Save button to save your rule.
That’s it! Now you have an Office 365 domain whitelist, and emails from that address will be delivered to your organization’s inboxes, not marked as junk.


