
In early May, Microsoft released the “2018-05 Cumulative update for Windows 10 Version 1803 for x64-based Systems (KB4103721). https://support.microsoft.com/en-us/topic/may-8-2018-kb4103721-os-build-17134-48-04b53c10-b34d-6acf-accf-3b4941a05745
When testing the deployment of the update to some test systems, we noticed that a few of the test systems had an odd quirk after the 1803 Cumulative update was successfully installed.
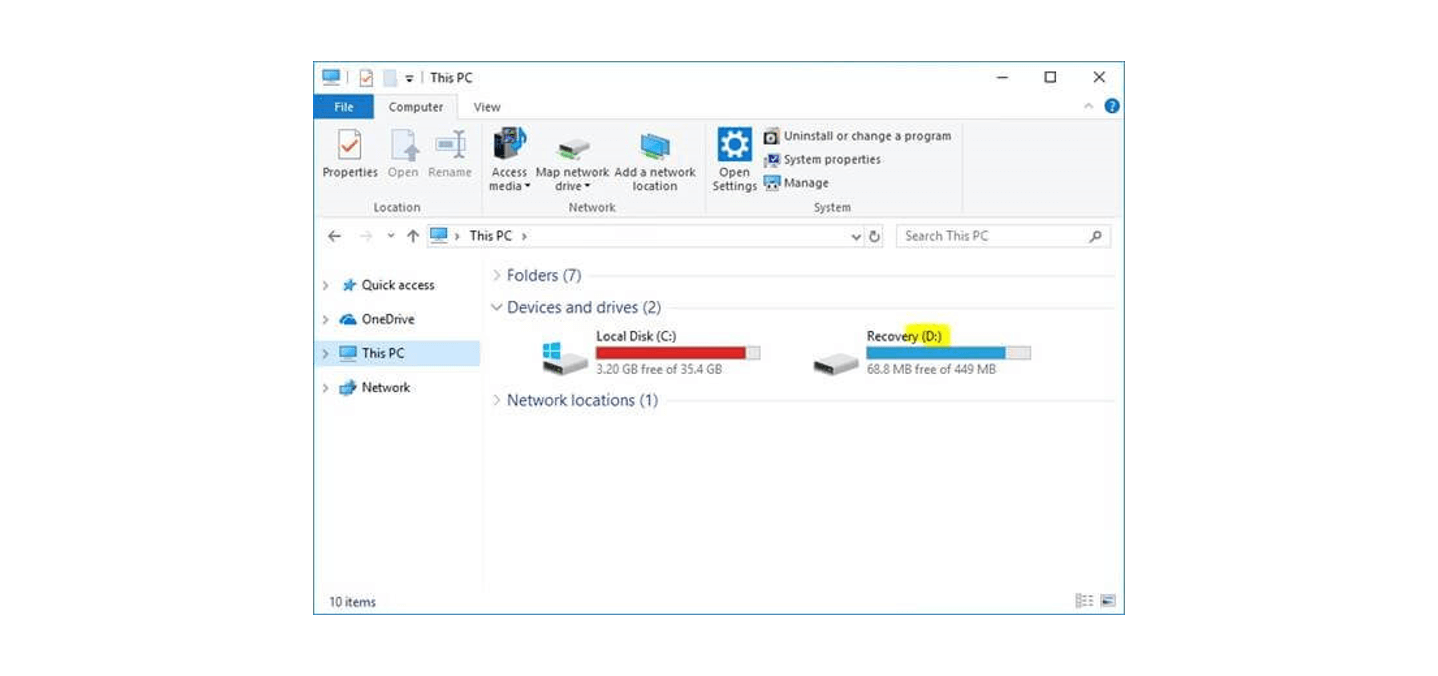
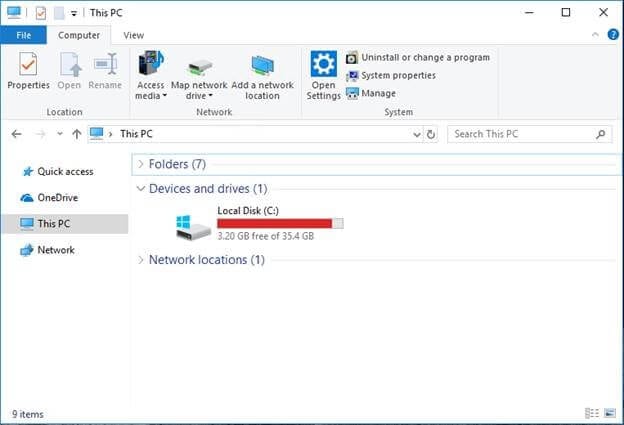
After the update on each system, we started getting popups notifying the user that a drive was getting full. This was a recurring popup. We noticed that in Windows explorer, the Recovery 450 MB NTFS formatted (OEM Partition) had been assigned a drive letter ‘D’ during the upgrade process, but it had not been removed at the completion of the upgrade installation.
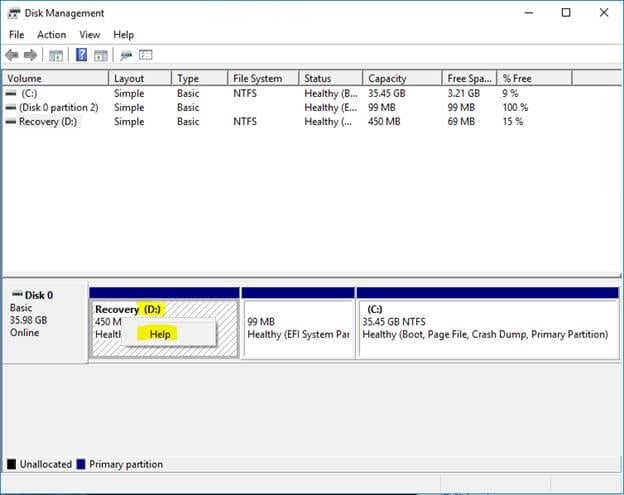
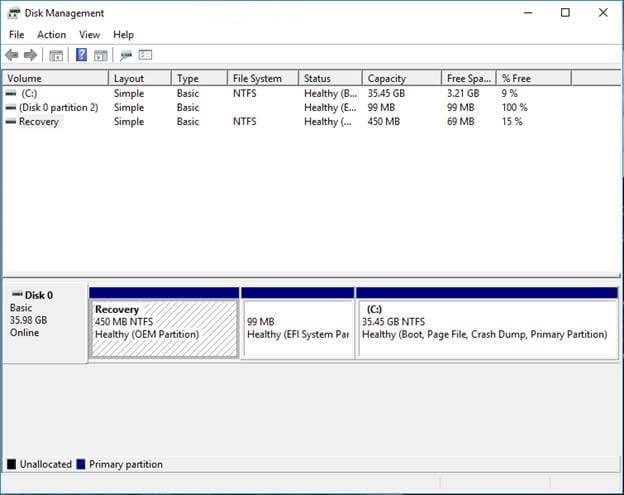
In Disk Management, the drive letter also shows as assigned. Right clicking on the Recovery drive partition does not give the option to remove the drive letter from the system partition.
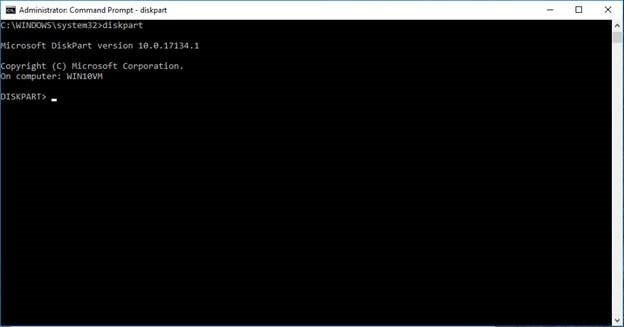
To remove this drive letter from the system Recovery partition, we need to use the Diskpart.exe utility from an administrative command prompt.
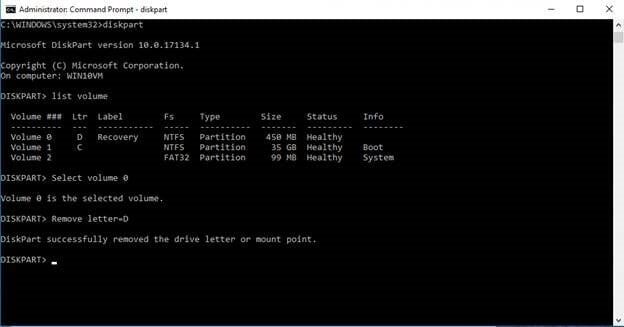
Open a Command Prompt with administrative permissions and type “diskpart” and press enter.
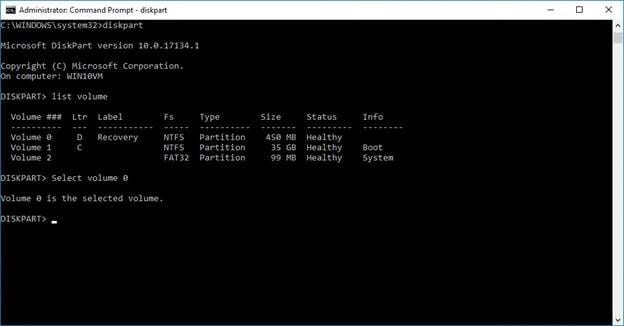
At the next prompt, type “list volume” and press enter.

You should now see the volumes and partitions. Notice the Recovery labeled volume with the undesired drive letter, in this case ‘D’.
Next we will select the Recovery volume that needs the drive letter removed.
Type “select volume 0” and press enter. Note that in your case the volume might be a different number than is shown in this example. Just make sure it is the corresponding volume number for the Recovery partition.
Now to remove the drive letter, type “remove letter=D” and press enter. Again, this letter may very well be different than shown in this example. Just make sure it is the corresponding drive letter for the Recovery partition.
If you still have Disk Management open, refresh the view and notice that the drive letter is no longer assigned to the system partition.
It has also been removed from the Windows Explorer view and there will no longer be popup warning about disk space running low for the Recovery partition.
Lucas Guth, PEI