

What is Power Automate?
Microsoft’s Power Automate is a cloud-based service that allows users to automate workflows between different applications. These workflows can be triggered automatically by events, can be scheduled, or can be triggered manually. Power Automate helps you streamline repetitive tasks throughout the day, so you can focus your attention on other aspects of your work.
Power Automate allows you to create automated flows. This means you can set up a series of steps that need to be completed in a process and Power Automate can complete them for you! There are 3 main components to a flow: the trigger, the action(s), and the connectors.
The trigger is the event that starts the flow. The actions are the events you want the workflow to complete once the trigger takes place. And the connector is a proxy or a wrapper around an API that allows the underlying service to talk to Microsoft Power Automate. Basically, the connectors allow Power Automate to talk to a variety of different apps. Power Automate can connect to more than just Microsoft owned apps, too. You can build a flow that posts to Twitter every time you upload a YouTube Video, because the connectors allow Power Automate to access and work with those apps.
To see how this comes together, look at this diagram of a simple flow:
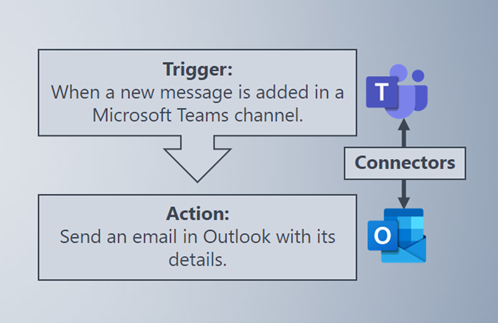
The trigger in this workflow is when someone posts a message in a Teams Channel. Whenever someone does that, it initiates the flow. The action, the event I want to take place after this trigger, is sending an email to my Outlook account with the details of the message. In this case, Teams and Outlook are connectors because Power Automate needs connection to both apps to complete this flow.
How to Access Power Automate
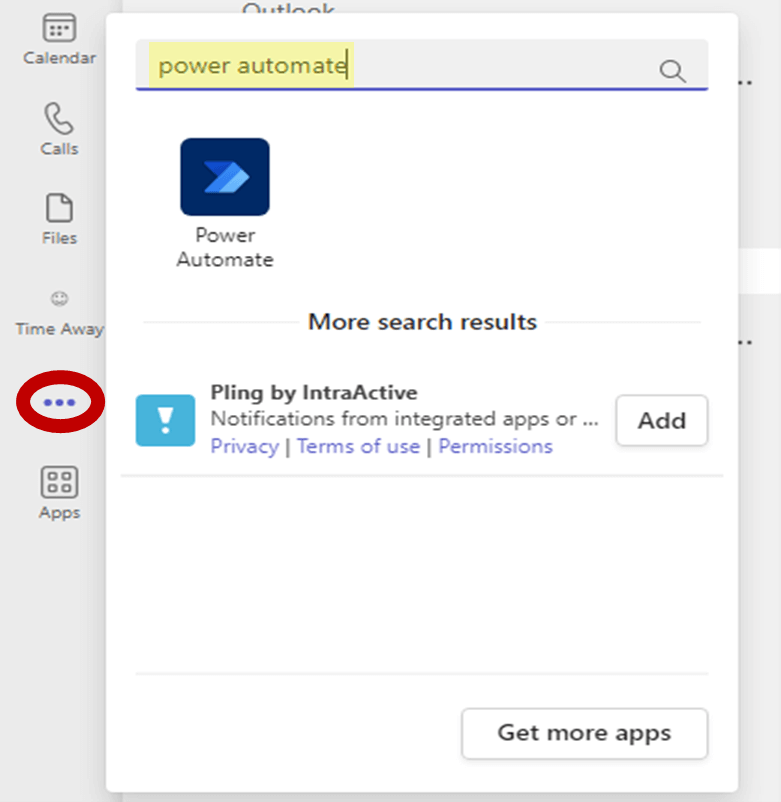
You can access Power Automate in several ways. To access it in Teams, navigate to your App Pane. Use the three dots to show more options for your app pane and search for “Power Automate” to add the app to your Teams experience.
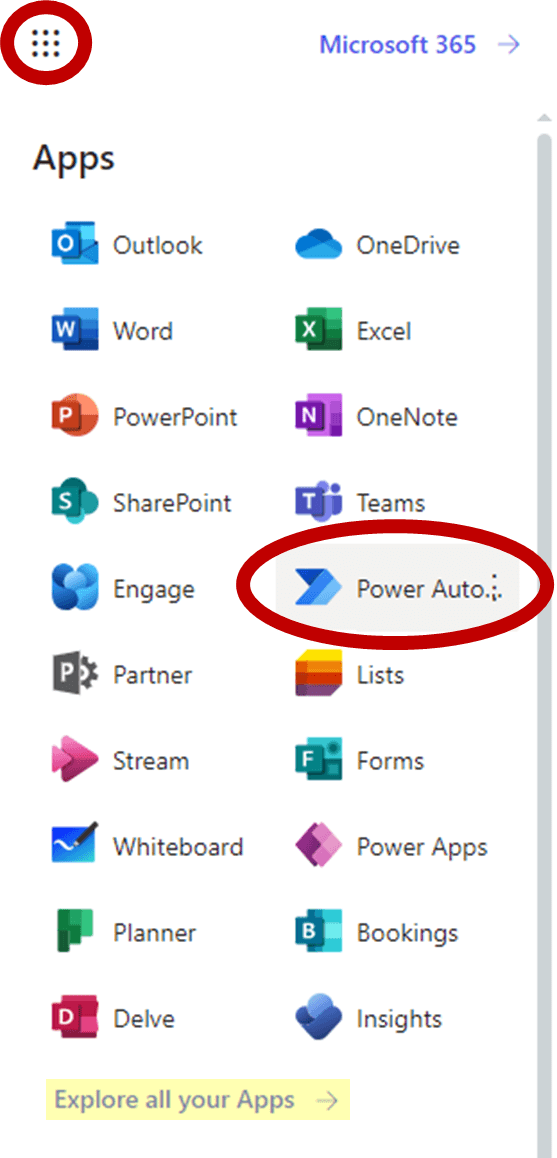
You can also access it from your Office Portal. When you log into your portal, click on the waffle icon in the top left corner to access all your apps. You should be able to find the Power Automate app, but if you don’t see it, you can always click “Explore all your Apps” to find it.
And lastly, my personal preference, is just to go to https://make.powerautomate.com/.
Getting Started with Power Automate
When I first learned about Power Automate, it was hard to think of tasks I wanted to automate. Throughout the day, there are plenty of repetitive tasks I wish I could minimize, but when I first sat down with Power Automate, I couldn’t think of anything. One pro-tip I received was to spend a week making note of all the repetitive tasks you complete throughout the workday. You can keep this list in your OneNote Notebook, your “chat with yourself” on Teams, in a Word document, or wherever you prefer to take notes throughout the day. Having this list will help you determine what workflows you might want to create.
But if you want to start right away, Power Automate offers resources to help. With the use of templates, and browsing popular templates, you can look at what others have already created. This might help you start thinking about tasks you could automate. Templates are pre-created automated tasks. They select the trigger, the action(s), and the connectors you will need to automate tasks. From here, you fill in the rest with your own information to make the template work best for you.
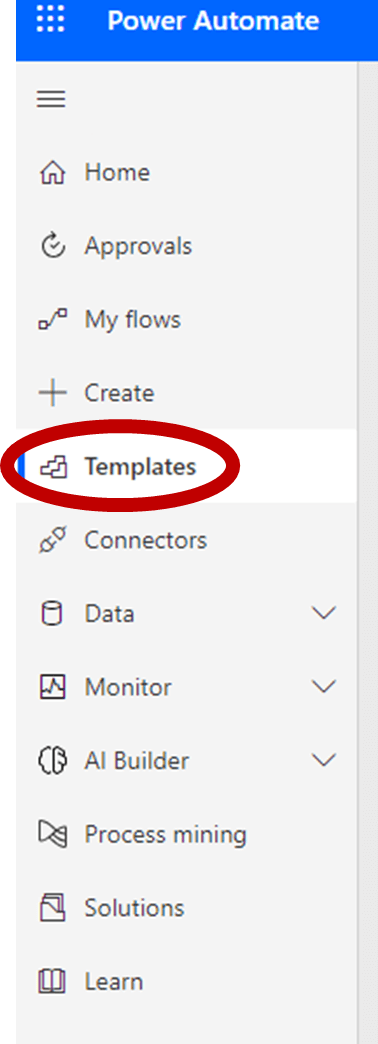
On the Power Automate homepage, you’ll see a menu on the left side of the screen. Using the menu, find and click “Templates” to view all the existing templates you can work with.
From the Templates page, you can either use key words that might relate to a task you want to automate to help you find an already existing template or you can use the options provided to help you browse the templates.

Editing a Template
Once you find a template that interests you, you can click on it to begin editing and customizing it to your needs. When you first select a template, you’ll want to make sure all your connections are successful.
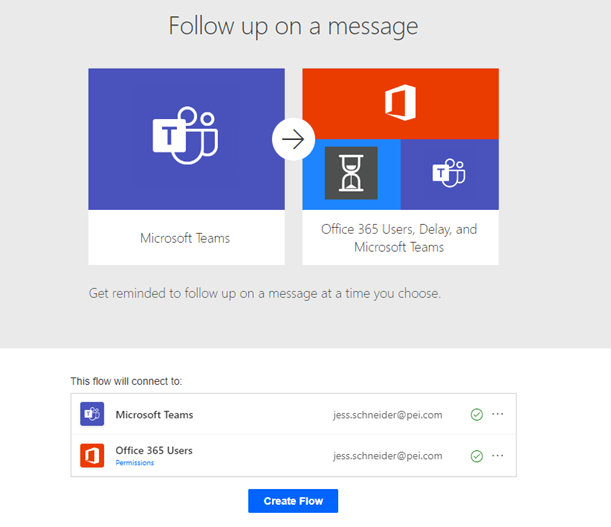
The green checkmarks indicate a successful connection; however, if they appear in red, you can simply click the three dots next to the connection to help you troubleshoot the issue.
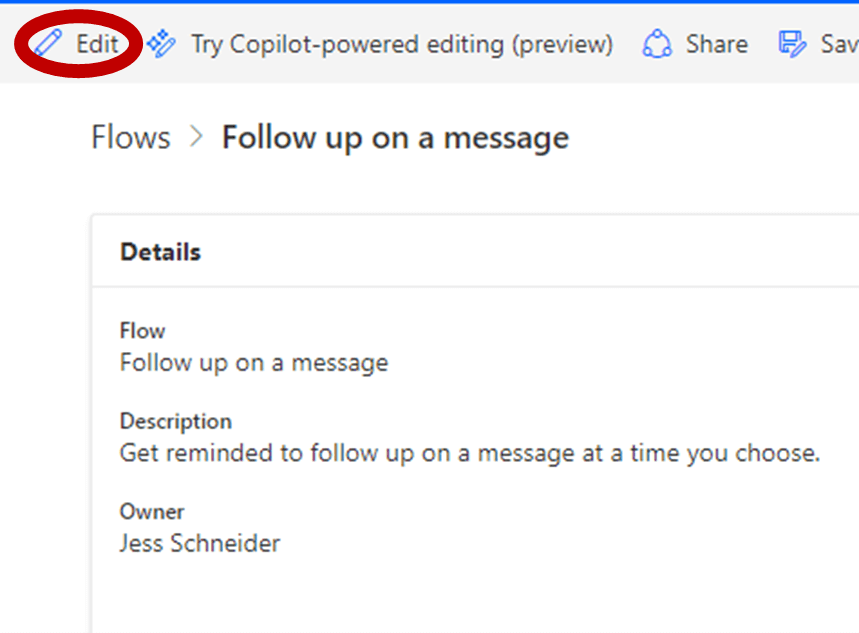
Once you hit create flow, Power Automate will create the workflow and add it to the “My flows” section in your sidebar menu. Now that the flow has been created, click “Edit” to customize it!
When you click to edit a template, you will see every step of the workflow listed in the order of which the steps will occur.
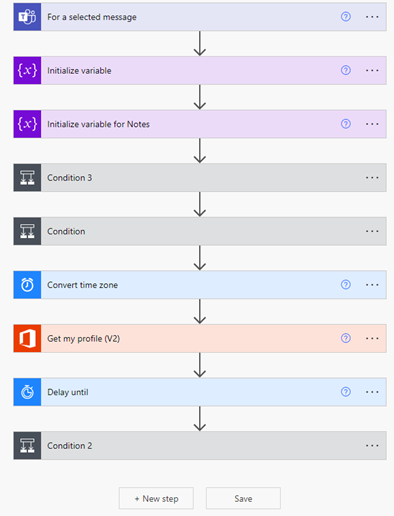
You can click into any step to edit it. To see what else you can change and customize in each step, click “Show advanced options”.
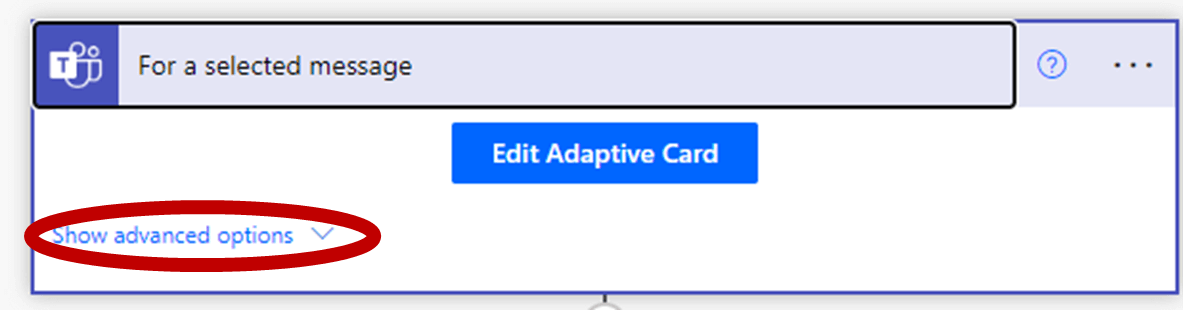
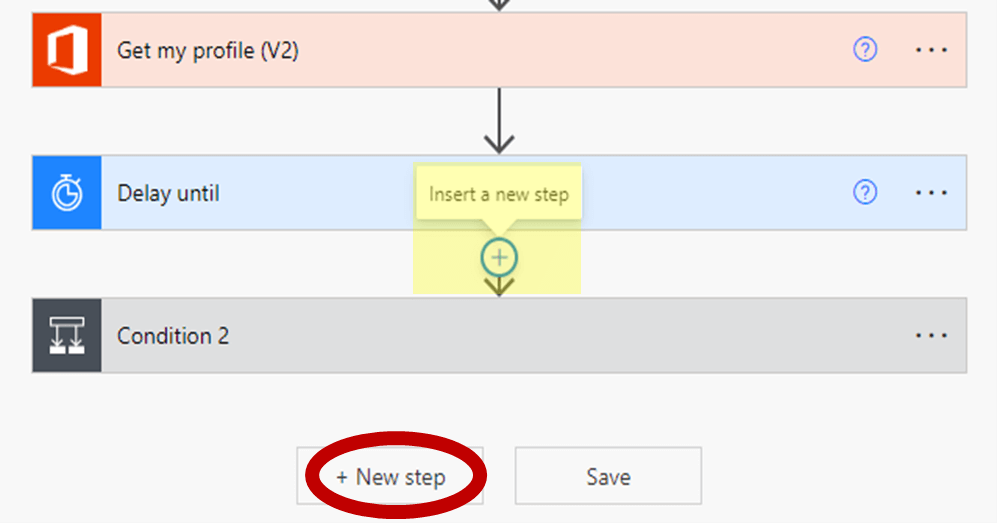
You can add additional steps to your flow by using the “+ New step” button at the bottom of the flow or you can add a new step in between parts of the flow by hovering over the arrow between them.
With the ability to edit each step of a template and even add your own steps, it’s pretty simple to create workflows that are completely customized to your needs!
Check the Health of Your Flows
Once you start creating flows, you’ll want to make sure that they are running properly. The best way to do this is to click “My flows” on your side bar menu, which will show you all the flows you’ve created. From here, you can turn flows on and off as needed and click into specific flows for more options.
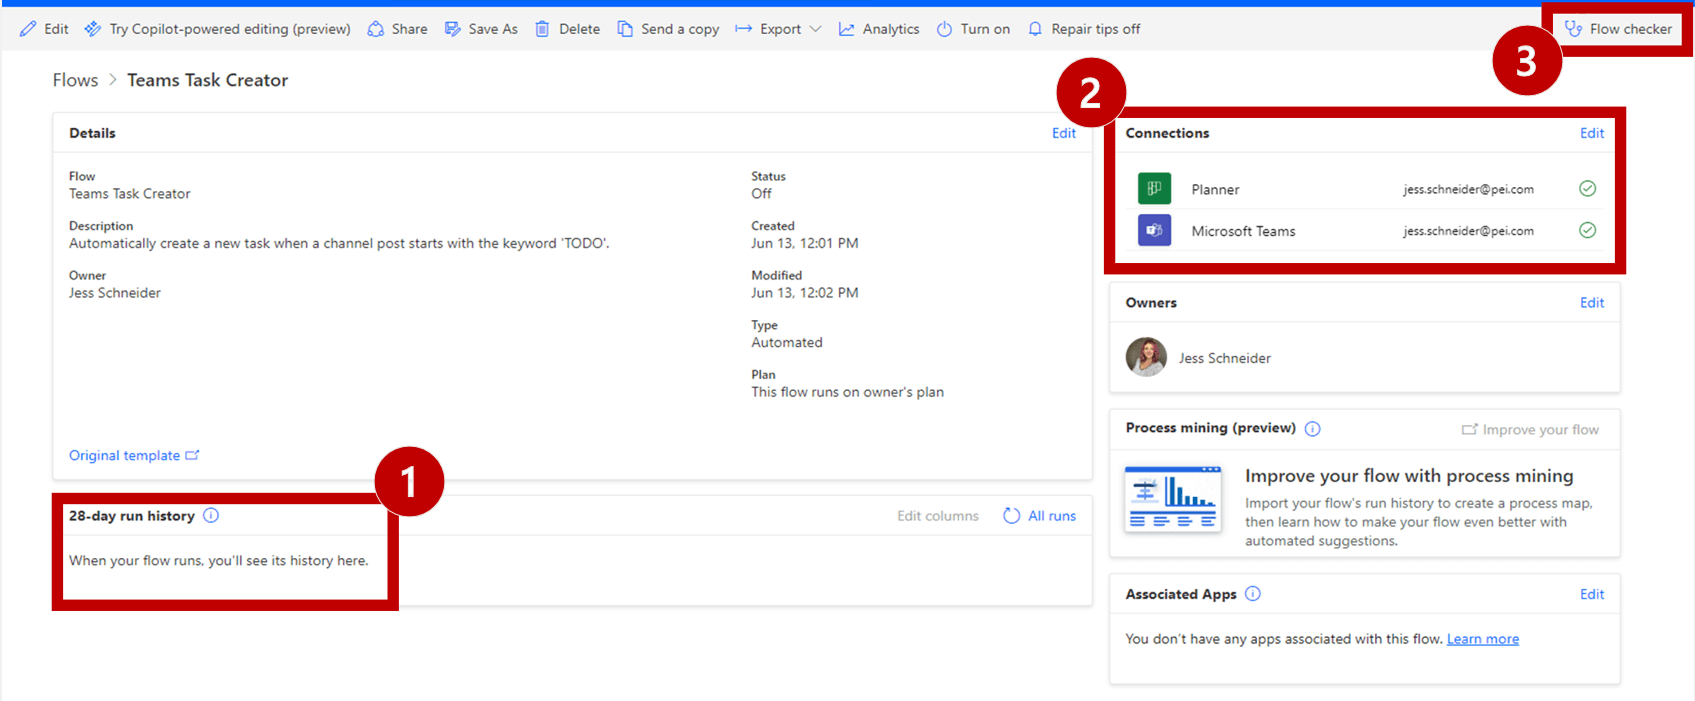
Once you select a flow, there are a few important places to check to ensure you’ve got a healthy workflow:
- 28-day run history: In this space, you’ll be able to see every time your flow has attempted to run over the past 28 days. If it fails to run, you’ll see that listed here. To see what went wrong, simply click on the failed attempt.
- Connections: From this space, you can double check that your connections to the necessary apps are still successful. If they are not, you can click “Edit” to manage the connections.
- Flow Checker: The flow checker is a tool that checks for issues and errors in the flow you’ve created. If you see a red dot by the flow checker, there’s an issue with your flow. You can click into it for more information about any errors or warnings that might impact your flow’s ability to run successfully.
Automate Your Workday Today!
Browsing popular templates can help you determine what tasks you might want to automate in your workday. But don’t forget there are a bunch of different ways to search for templates and flows. You can use the search bar in the templates page to find what you might be looking for, or even click into the “Connectors” option on your side bar to see all the apps Power Automate can connect to.
So, when you find yourself with some free time during your workday, check out the Power Automate homepage. You can explore what tasks you might be able to automate and complete more efficiently! If you don’t have Microsoft 365, but want to get started, contact PEI. We are happy to help with all of your Microsoft needs!
Jess Schneider, PEI


