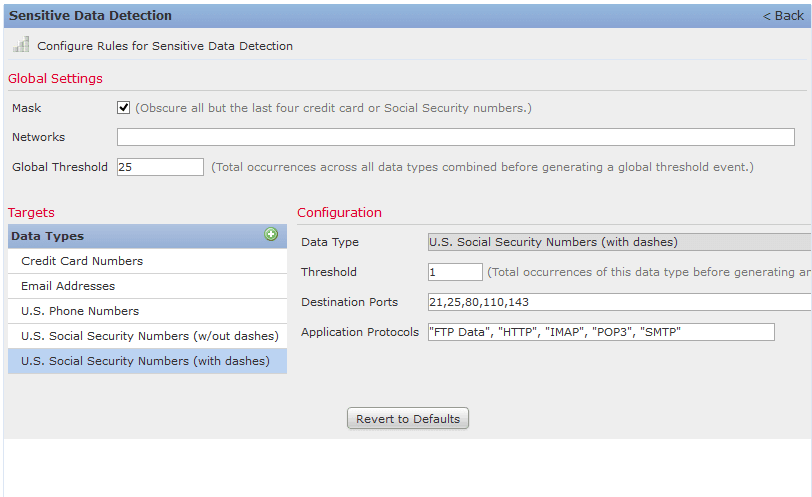
Many companies have a security policy prohibiting the sending out of customer email addresses and social security numbers. It still happens, and it’s hard to stop people from doing it. Unless you’re reading every email or watching every file going out, it will always happen. Part of this is a training issue, other times, people are taking the easiest path to “just get their work done.” So how do you catch this? If you have a Cisco Firepower system set up, you can setup a “Sensitive Data” Intrusion Protection System (IPS) policy to find and alarm on these events.
I will give you a walk-through of setting up a sensitive data policy in the Firepower Management Console (FMC). To setup a sensitive data policy, we will have to setup (or already have setup) an Intrusion policy. Also, we will have to setup an access policy. We will then and ensure that alarms are being generated. After all of that, we will be able to see any sensitive data going across the firewall alarmed off in the Firepower Management Console (FMC).
Once you are logged into the Firepower Management Console (FMC),
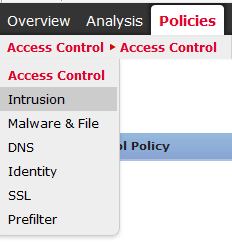
- Click Policies > Access Control > Intrusion (at the top of the page):
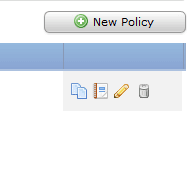
- If you have a current IPS policy, you can edit that policy by clicking on the edit button (yellow pencil) on the right side of the widow. If you do not have a policy, click add new policy button at the top right portion of the window.
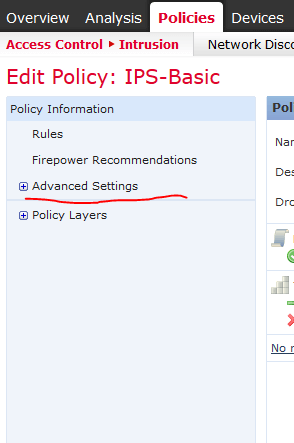
- Once you have an IPS policy, go to Advanced Settings on the left Policy Information pane:
- Then you want to ensure that the Specific Threat Detection is enabled, and click the edit button (yellow pencil) at the far right:

- Select the sensitive data that your policy wants to monitor and alarm on: Social Security Numbers, US Phone Numbers, Credit Card Numbers, and/or Email Addresses. For this walk through, we are looking at Social Security Numbers with dashes.

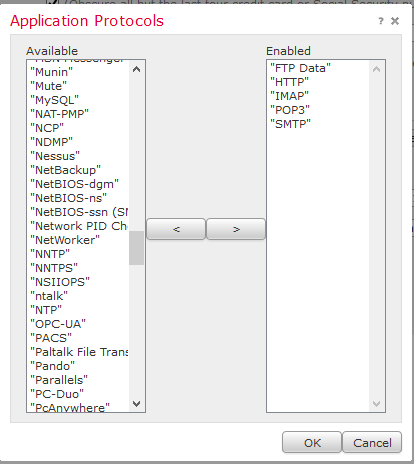
- Under Configuration, you can modify the Threshold—the number of times it has to happen in an email or a document for the system to raise an alarm. Also, you can modify the ports/protocols that the policy will monitor. If you click into the Application Protocols, it will bring up another window to choose the protocol/application from.
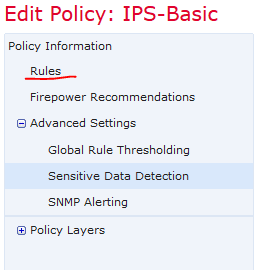
- Now click back on the left-hand Policy Information category pane and go to the Rules
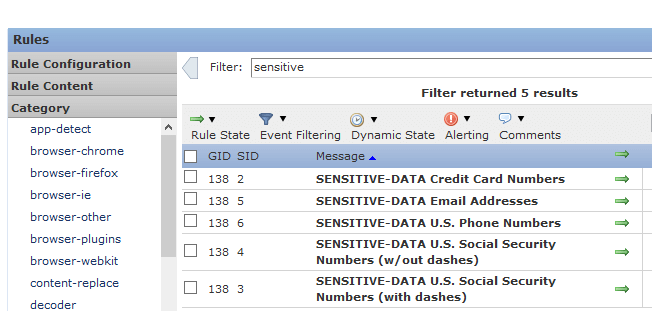
- On the top filter, type “sensitive” in the filter box and hit enter.
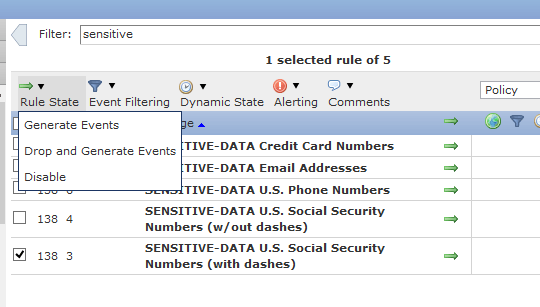
- Select all the rules you want active. In our example, we are using the U.S. Social Security Numbers (with dashes). Select the rule by clicking the box on the left of the rule number. Then go up to the Rule State and select either Generate Events or Drop and Generate Events, depending if you want to block the traffic and alarm or just alarm on the traffic.
- Now go back to the left-hand Policy Information pane and click on Policy Information
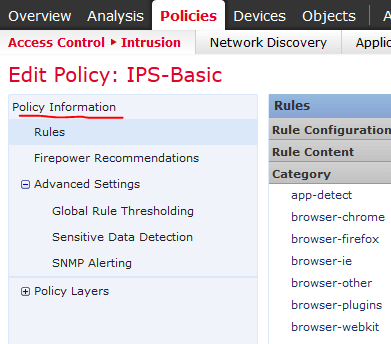
- If you setup the policy to drop and generate, then you want to click the check box Drop when Inline

- Now click the Commit Changes button and type in a description of the changes made.
- Then we need to attach the IPS policy back to the Access Control policy. To do this go to the top navigation bar Policies > Access Control > Access Control and edit your primary Access Control Policy.
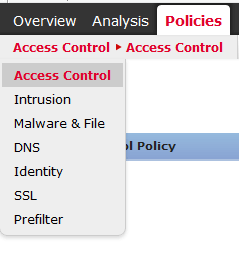
- Highlight your primary Access Control Policy and click on the edit button (yellow pencil) on the right of the screen.

- Now we can tie our Network Analysis policy (IPS policy) to the Access policy. This is done by going to the Advanced tab at the top of the inner table:

- Go down to Network Analysis and Intrusion Policies and click the edit button (yellow pencil):
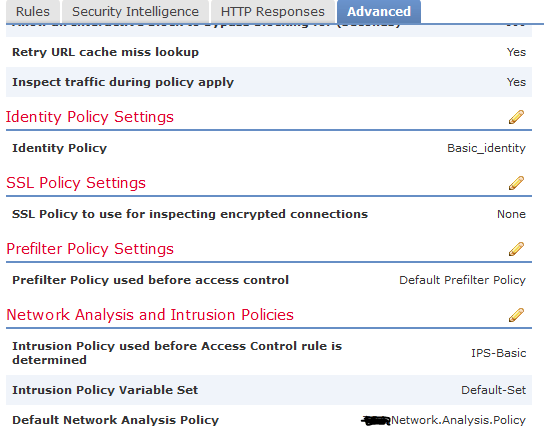
- Add your IPS policy from above to the Default Network Analysis Policy and click OK.
- Click Save in the upper right side of the page
- Click Deploy in the top bar at the upper right corner
![]() .
.
- After the deploy finishes, you can see the events generated at the Analysis > Intrusions >Events:
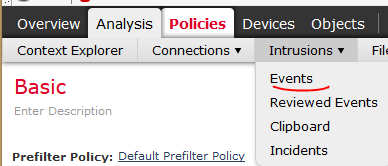
- If you have any matches for outbound data, you should see the events caused by the sensitive data policy here in the drop-down list. This assumes that someone did try to send out sensitive data across one of the monitored applications. Luckily, in my test case I have over a hundred separate events of people sending out data. This isn’t the exact rule I’ve just shown; instead, it was for U.S. Social Security Numbers without dashes. The rule I just demonstrated included dashes. So, these could be false positives.

Looking to fine tune your security practice? Contact Us to learn how you can keep your business secure from modern threats!
Hopefully this document showed how to setup an Intrusion Protection policy to alarm off on sensitive data going across the firewall by defined application. Also, this walkthrough should show you the relationship between Access polices and Intrusion Protection policies and how and where we must connect them together. There are many different types of Intrusion protection policies. Each of these IPS policies need to be setup in the Policy Information as we showed with the Sensitive Data rules. Then, each rule needs to have its rule state be set to either Generate Events or Drop and Generate Events to actually enable the rule.
Even after we have the IPS policy defined like we want it to, we need to “link” the IPS policy to the Access policy in the Advanced Tab of the Access policy. You will notice that there are many other sections of Advanced Tab of the Access policy. This is where we attach our Anti Malware Policies (AMP), identity policies, and execute many of the other Advanced features the FMC. In short, most features that we will want to enable will need to be attached to the Access policy to become live in the FMC.
Jason Howe, PEI


